Upgrading ArcGIS Enterprise provides an opportunity to ensure your organization takes advantage of the latest and greatest features. Whether it be bug fixes or all-around better user experience, the ArcGIS Enterprise team keeps in mind customers needs and desires in each software iteration.
It comes to stand that upgrading ArcGIS Enterprise can provide its own suite of challenges. In this Monthly Linux Tip, we will walk through an upgrade from ArcGIS Enterprise 10.7.1 to ArcGIS Enterprise 10.8.1. It is important to note that we will not be utilizing ArcGIS Enterprise Builder; we will upgrade each product in the Enterprise suite individually.
Below is the table of contents this blog will follow:
- Backing up your data
- Obtain new setups and authorization files
- Upgrading Portal for ArcGIS
- Upgrading Web Adaptor (Portal for ArcGIS)
- Upgrading ArcGIS Server
- Upgrading Web Adaptor (ArcGIS Server)
- Upgrading ArcGIS Data Store
For simplicity, this demo uses ArcGIS Enterprise on a single machine. However, this blog is still applicable to environments that have ArcGIS Enterprise divided across multiple machines.
1. Backing up your data
Before we tackle the actual upgrading process, it cannot be stressed enough to back up your data! Whether it be through snapshots of your architecture or utilizing ArcGIS Enterprise’s built-in backup tools, this step is crucial. Should the upgrade process go amiss, peace of mind will be held knowing that you can default back to a snapshot and/or have a backup of your data.
2. Obtain new setups and authorization files
As discussed in the documentation for upgrading ArcGIS Enterprise, the first step is obtaining the new setups and authorization files from My Esri. As this blog is going from ArcGIS Enterprise 10.7.1 to 10.8.1, please ensure that you get your appropriate version’s files.
If your My Esri account has any issues, please contact Esri Customer Care and they can assist you further.
3. Upgrading Portal for ArcGIS
Now we are ready to begin. Firstly, we will need to open up our command lines and navigate over to our Portal for ArcGIS setup. It is important to note that there is no specific upgrade Setup file. In other words, you can treat the initial upgrade process as if you were installing for the first time.
Looking at the usage help for the Setup file, we see this is true as well:
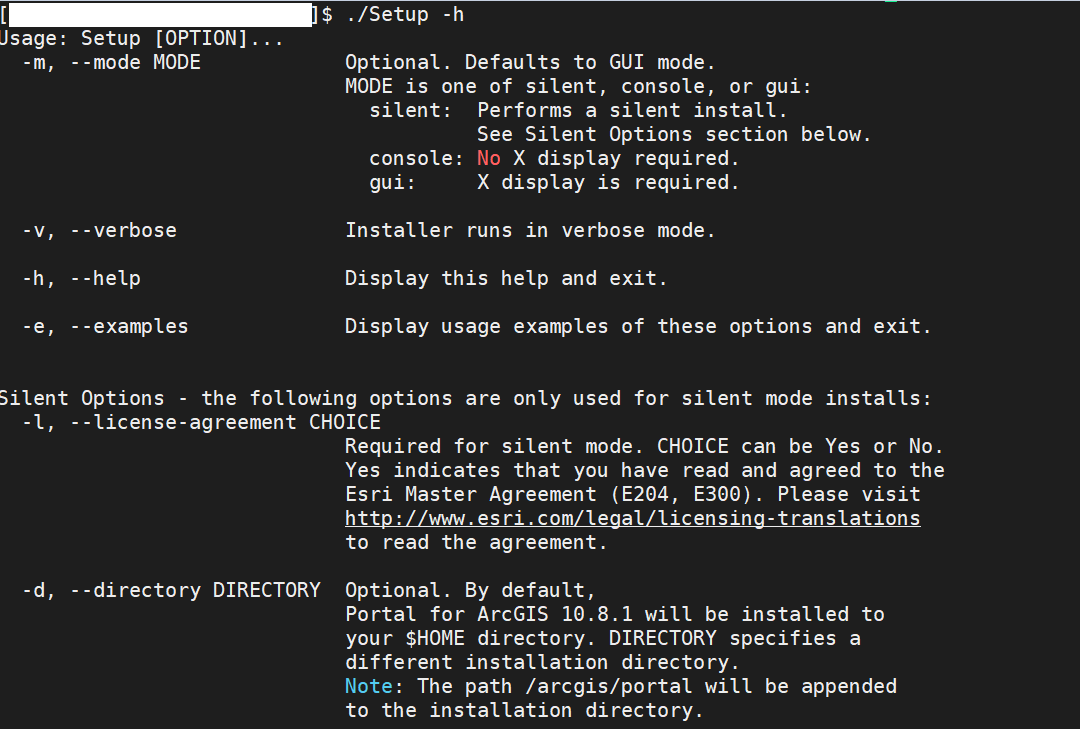
In order to run, we will use the following syntax: ./Setup -m silent -l yes. Please see below:
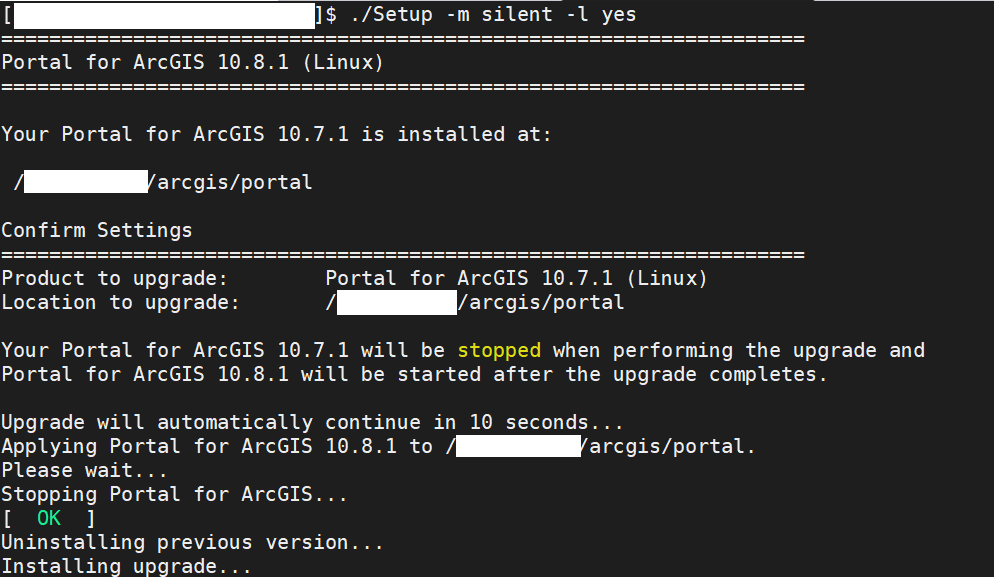
As can be seen above, the Setup file picks up on the installation directory of our 10.7.1 installation. By design of the script, the 10.8.1 version will extract all files and resources to that location and perform the upgrade.
Please be aware that depending upon the size of your previous installation, this may take a considerable amount of time. Once it does finishes, however, we should see the below message:

Once that is done, we need to finish the second portion of our upgrade. As this is a silent upgrade blog, we will utilize the upgradeportal tool. This is found over at /<ArcGIS installation directory>/portal/tools/upgradeportal:

Looking at the usage help of this tool, we recognize the flags that need to be set:

Once ran successfully, the upgradeportal tool will provide the following output:

4. Upgrading Web Adaptor (Portal for ArcGIS)
If you do not plan to use a third-party load balancer, then you can ignore this section. For upgrading the ArcGIS Web Adaptor, technically it is not an “upgrade”. We will be performing the following steps:
- Uninstall ArcGIS Web Adaptor 10.7.1
- Undeploy Portal for ArcGIS Web Adaptor from our web server
- Install ArcGIS Web Adaptor 10.8.1
- Deploy Portal for ArcGIS Web Adaptor to our web server
- Register ArcGIS Web Adaptor to Portal for ArcGIS
For uninstalling, navigate to <ArcGIS installation directory>/webadaptor10.7.1/java and run the uninstall_WebAdaptor script:

Once done, we need to undeploy specifically our Portal for ArcGIS Web Adaptor from our web server. In this demo, I am using Tomcat as my Java web server to unregister as shown below:

Once done, we can now install the new 10.8.1 Web Adaptor. Navigate over to your Web Adaptor setup file and view the usage help:
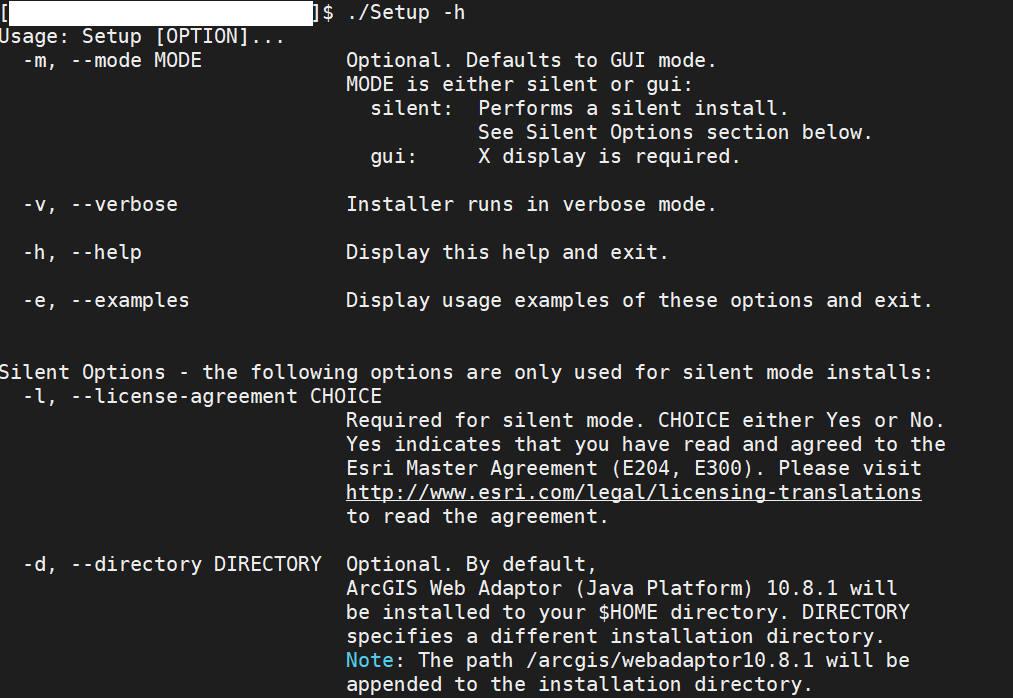
Notice a pattern? In general, the Setup file across each product in the ArcGIS Enterprise suite runs the same. Running the script gives us the following:

Once installed, we will register to our Tomcat web server. Please see below:

All set to register the Web Adaptor to Portal for ArcGIS! Navigate to <ArcGIS installation user>/webadaptor10.8.1/java/tools and view the configurewebadaptor.sh tool. We will run with the following syntax: ./configurewebadaptor.sh -m portal -w https://<Web Server URL>/portal/webadaptor -g -u <Portal for ArcGIS username> -p <Portal for ArcGIS password>

5. Upgrading ArcGIS Server
Keeping a consistent design across the board, silently upgrading ArcGIS Server and ArcGIS Data Store looks near identical to Portal for ArcGIS. In order to run, we will use the following syntax: ./Setup -m silent -l yes -a <Server license directory>. Please see below:
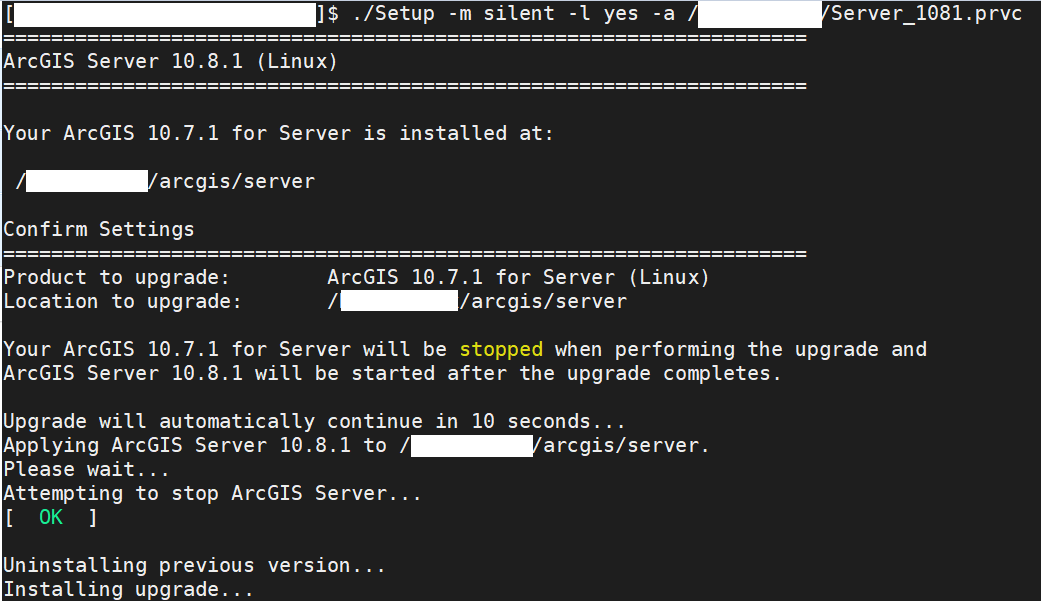
Once successful, we will see the following:

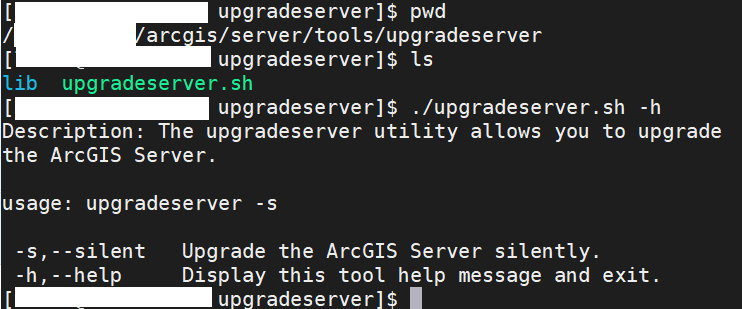
Like the Portal for ArcGIS upgradeportal tool, ArcGIS Server has a upgradeserver tool that we will use. Navigate to <ArcGIS installation directory>/server/tools/upgradeserver and view the upgradeserver.sh tool:
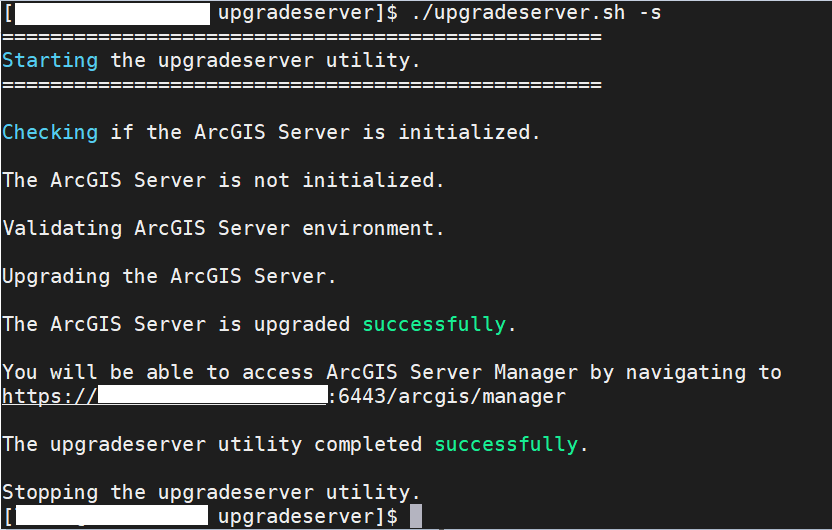
Running successfully will look like the following:
6. Upgrading Web Adaptor (ArcGIS Server)
As you might have guessed, this process is the exact same as with the Web Adaptor for Portal for ArcGIS. As such, once we follow all the steps in the prior Web Adaptor section, we should see the following result:

7. Upgrading ArcGIS Data Store
Almost done! Lastly, we will need to upgrade the ArcGIS Data Store. Keeping with the flow of the Setup scripts, please see the workflow below:
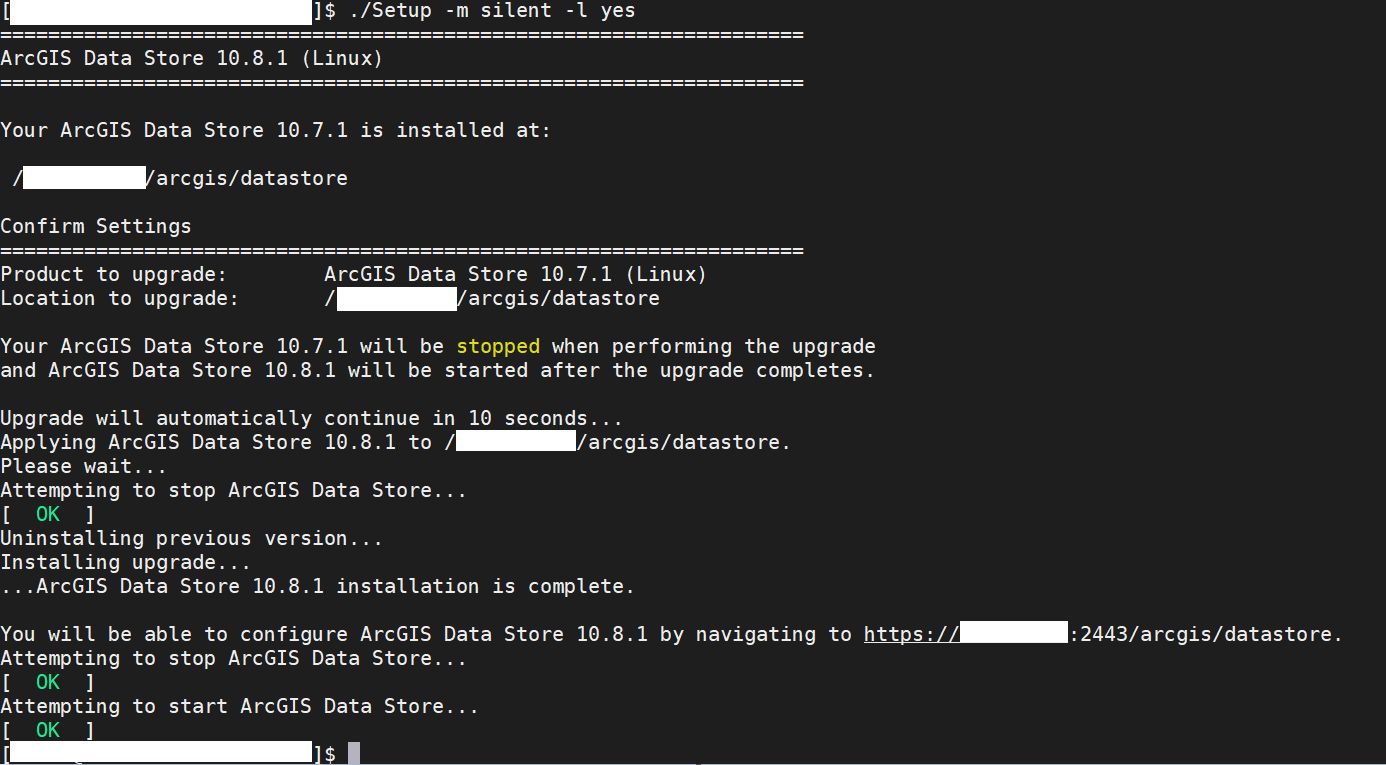
Once done, we will need to upgrade. Depending upon the Data Store types that you have previously had configured, the syntax may change. In this demo, I only have the relational Data Store previously configured.
Navigate to <ArcGIS installation directory>/datastore/tools and view the configuredatastore.sh tool. The syntax we will use is the following:
./configuredatastore.sh https://<FQDN>:6443 <username> <password> <Previous Data Store content directory> –stores <relational,tileCache,spatiotemporal>

With that, we are finally done! If you head over to your ArcGIS Enterprise base deployment, you will notice that is upgraded successfully to version 10.8.1.
Conclusion
We have gone over step by step the process of silently upgrading ArcGIS Enterprise 10.7.1 to 10.8.1. Please let me know in the comments if this was of help and what you would like to see next month. Thank you for reading this Monthly Linux Tip!

Article Discussion: