There are many use cases where you need to schedule a geoprocessing model or script tool to run at specific times and days. Examples include updating data, backing up projects, or perform analysis at non-peak hours. Scheduling a geoprocessing tool allows you to schedule and repeat a tool you need to run regularly or to run a lengthy process at a convenient time. One of our most popular blogs was a post from my colleague Dale Honeycutt in 2013 “Scheduling a Python script or model to run at a prescribed time.” In fact, the post was so popular that it was updated in 2019 to reflect ArcGIS Pro, Windows 10, and Python 3. The suggested approach is to start with a Python script, call a geoprocessing tool or model, and then create a task using Windows Task Scheduler with the Python script as the task. Here is another post from my colleague Bruce Harold suggesting a similar approach to schedule an ETL process using the Windows Task Scheduler, this time without the Python script.
I am happy to report that with the ArcGIS Pro 2.5 release (due out this month), you can now schedule a geoprocessing tool including a model tool directly within ArcGIS Pro from the Geoprocessing pane!
To elaborate more on this topic, I am going to use a simplified model tool example from the ArcGIS Pro Schedule a model help topic.
The model below loops through all the feature classes in an input workspace and then creates a backup copy to a user specified backup workspace.
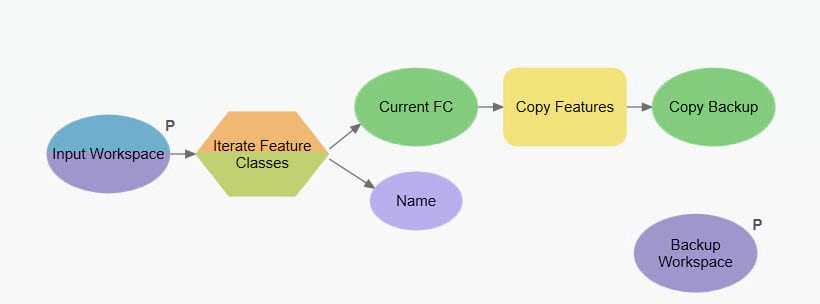
To schedule this model to run every Sunday at a specific time, open the model tool which I named “Backup” from the ArcGIS Pro project and then specify the required parameters:

Use the Run button’s split menu to choose the Schedule Calendar.

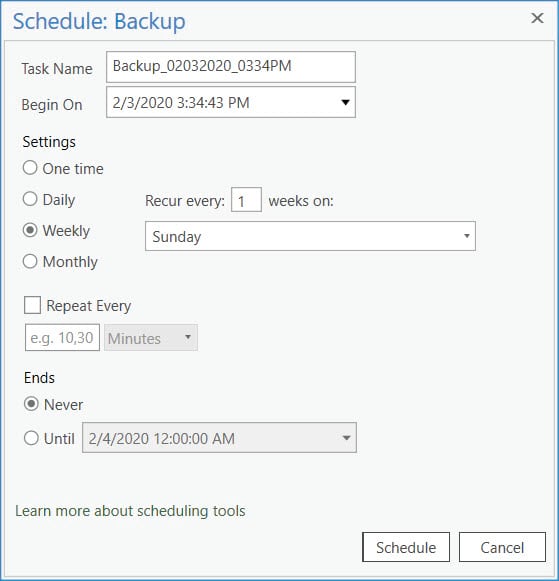
In the Schedule Calendar window, I specified to run the “Backup” tool weekly on every Sunday and confirmed by clicking on Schedule to finish and schedule the “Backup”. See below:
That’s it. I am done! So, as you can see setting up a schedule to run a geoprocessing tool is quite straight forward with ArcGIS Pro 2.5. In addition, we also provide several ways to manage a scheduled tool in ArcGIS Pro.
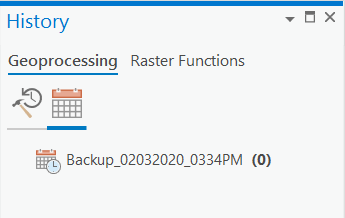
Once a geoprocessing tool is scheduled, it is then listed in the Geoprocessing>Scheduled section of the History pane.
The Scheduled section will display all tools that are scheduled to run on the machine using your user account, regardless of the project from which the tools were scheduled. However, you must be logged in to the machine to see your scheduled tools.
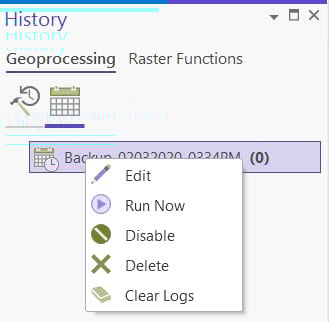
You can manage scheduled geoprocessing tools by editing the schedule options such as date and time, recurrence, expiration, and other options. You can pause or delete the scheduled tool or run the scheduled tool immediately to make sure it works successfully.
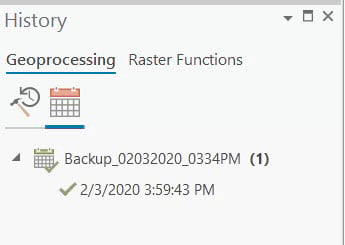
Each tool in the Scheduled section will include a list of the execution history of the tool. Each time the scheduled tool runs, a new time-stamped item will be added below the entry for the scheduled tool with an icon indicating whether the execution completed successfully or failed:
Note that you can also run scheduled geoprocessing tools from outside of ArcGIS Pro because the tools are scheduled in your operating system’s scheduler application. As long as all the changes to the ArcGIS Pro project are saved, and the “Sign me in automatically” option is selected when using Named User license, ArcGIS Pro does not need to be open and active at the time a tool is scheduled to run. The geoprocessing scheduling feature in ArcGIS Pro 2.5 also works with Single Use and Concurrent Use licensing in addition to the Named User license.
I have only provided one example of the new approach to schedule a geoprocessing tool in ArcGIS Pro 2.5. There is much more you can do and please try it out once you are able to deploy ArcGIS Pro 2.5.

Commenting is not enabled for this article.