Starting ArcGIS Pro 2.8, authoring this kind of layers is made very easy using Make Aggregation Query Layer. Please read about this in the following blog and ArcGIS Pro help:
- Make Aggregation Query Layer – a new geoprocessing tool to compute and view dynamic summary statistics from related records
- https://pro.arcgis.com/en/pro-app/latest/tool-reference/data-management/make-aggregation-query-layer.htm
I have written two blog posts previously on this topic. There were basically two drawbacks in the approaches described in those posts:
- In one approach, even though the computation was dynamic, the time window/duration and time steps had to be predefined and fixed.
- In the other one, expertise in server object extension (SOE)/server object interceptor (SOI) is required.
To overcome these limitations, in ArcGIS Pro 1.4 we introduced parameters to query layers, allowing you to perform spatiotemporal and aggregate analysis dynamically from related tables. The advantages are significant with this new approach:
- You can compute basic statistical (aggregated) results dynamically.
- Since the computation is dynamic, you always get aggregated results from the latest updates.
- Any time duration and time steps can be used.
- It performs well since computation occurs at the database level.
- No programming knowledge is needed. All you need is some basic SQL knowledge.
Consider
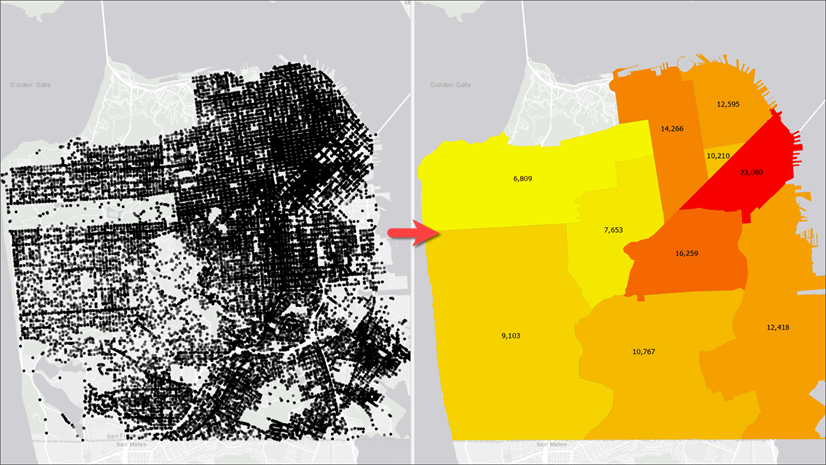
Query layer is the only kind of layer in ArcGIS Pro whose source can be a SQL statement, which could be as simple as “SELECT * FROM aTable” or very complex with joins, aggregated results, etc. The SQL query gets evaluated by the database, results get sent back, and a query layer draws the result in ArcGIS Pro. Query layers are only supported for enterprise databases such as SQL Server, PostgreSQL, and Oracle—they are not supported for file geodatabases. For that reason, the data needs to be copied to the enterprise database of your choice.
Prepare the Data
Let’s get started:
- Download an ArcGIS Pro package to get started with sample data.
- Double-click the package file you downloaded to open it in ArcGIS Pro.
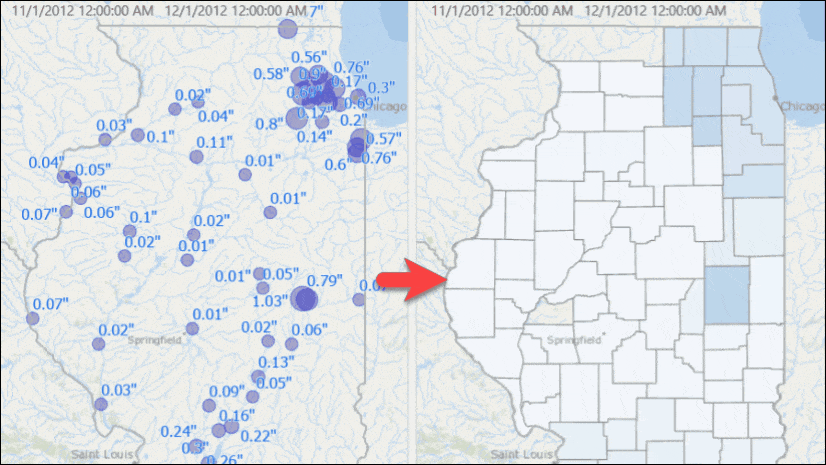
The Rainfall Data map appears. It contains one layer and two tables:- The Rainfall Stations layer—This has 79 stations with their locations and some basic attributes.
- The Rainfall TimeSeries table—This contains each station’s rainfall amount with dates and times, collected at 15-minute intervals over four months. It has about 28k records.
- The Rainfall Monthly Avg table—This has the historic average monthly rainfall for all but one of the stations.
- Create a new database connection to your enterprise database
- Go to the Catalog pane, then navigate to Databases\Rainfall_IL.gdb.
- Copy all feature classes and tables from the file geodatabase to your enterprise database.

Compute Total Rainfall for Each Station
Next, we’ll create a table:
- Click the Query Layer option from the Add Data command on the Map.
- Select your database connection.
- Give it a name such as Total Rainfall.
- Copy the following query and paste it in the Query text box:
SELECT site_no, SUM(rainfall_inch) AS Total_Rainfall FROM USGS_Rainfall_TimeSeries_IL GROUP BY site_no - Click Validate.
- Click Next.
- Check the site_no checkbox in the Unique Identifier Field(s) list.
- Click on Finish.
- Open the newly added table.
You will see that the table contains the total rainfall (dynamically computed) at each station for the entire four months. Since this table does not have spatial data, it cannot be drawn on a map.
This section is just to provide some background information. If you want, you can remove this table.
Visualize Total Rainfall on a Map
The USGS_Rainfall_Stations_IL feature class contains spatial data. We need to combine the computed total rainfall with spatial data. For this, we will use SQL joins and do the following:
- Add another query layer with the following SQL query:
SELECT s.*, r.Total_Rainfall

FROM USGS_RAINFALL_STATIONS_IL s

INNER JOIN

(SELECT site_no,

SUM(rainfall_inch) AS Total_Rainfall

FROM USGS_RAINFALL_TIMESERIES_IL

GROUP BY site_no) r

ON s.site_no = r.site_no- This time, a query layer gets added to the map:
- Click any station on the map and see the total amount of rainfall (in inches) measured at that location on the Popup.
- Symbolize the layer with proportional symbology using the Total_Rainfall attribute.
- Label the features using values in the Total_Rainfall attribute as well.
Compute Total Rainfall for Any Time Duration
What we have so far is a layer where each station is populated with its total rainfall computed from all records off the time series table. What we want now is to draw rainfall stations with the total rainfall from a specific time duration—for instance, a week, a month, a three-day period, or any arbitrary time window.
- Open the Layer Properties page of the query layer created in the last section, and click its Source tab.
- Click the blue pencil icon to open the Edit Query Layer dialog box.

- Insert a WHERE clause with the range parameter right after the time series table name.
WHERE ::r:timeRange

- Click the pencil icon to bring up an inline editor to define the parameter.
- Fill in all the necessary information as shown in the following screenshot:
- Field or Expression—Type date_time.
- Data Type—Choose Date.
- Default value—Uncheck the check box.
- Name of the table the field belongs to—Type USGS_RAINFALL_TIMESERIES_IL.

- Click Done.
- Validate the SQL query layer.
- Click Next.
- Click Finish.
If you click the Time tab on the Layer Properties page now, you will see that the time settings got automatically defined. When you define a range parameter of the Date data type, the layer is automatically made time aware and will start honoring the map’s time slider’s settings.
- Click OK.
The time slider appears on the map.
- Enable time slider from the Time tab.
- Set the time span to 1 week.
You will see stations with their rainfall measurements for that week.
Use the time slider to go to another week, or change the time settings to view results for another window of time. If you want you can set the time span to bi-weekly or any arbitrary time duration, and you will see map is updated with dynamically computed total rainfall for that time duration.

Visualize Data with Moving/Rolling Averages
Now we’ll use time settings to view stations with moving/rolling averages while stepping through time:
- Open the Layer Properties page of the query layer created in the last section, and click its Source tab.
- Click the blue pencil icon to open the Edit Query Layer dialog box.
- Insert the following aggregated field (including the comma at the beginning) into the SQL query right after Total_Rainfall:
, AVG(rainfall_inch) AS Avg_Rainfall - Step through the Edit Query Layer wizard and update the layer.
- Change the layer’s proportional symbology to use the Avg_Rainfall attribute.
- Change the layer’s Label properties to use the Avg_Rainfall attribute.
- View the three-day moving/rolling rainfall average by making the following changes on the Time tab:
- Span—Set to 3 days.
- Use Time Span—Uncheck the check box.
- Step Interval—Set to 1 day.

Now step through time with the time slider. You will see that features are drawn with the three-day moving/rolling average as it moves forward one day for each time step. If you want to see weekly moving average, all you need to do is to set the Span value to 1 week.
Show Anomalies
In this section, we will see how to draw stations differently when their monthly rainfall exceeds the historical rainfall average for a given month.
In this case monthly rainfall averages are stored in a separate table named USGS_Rainfall_Avg table. We will now use data from that table to produce a map showing stations with anomalies in red:
- Create a new query layer with the following SQL query:
SELECT s.*, r.Total_Rainfall, av.Avg_Monthly_Rainfall, r.mo

FROM USGS_Rainfall_Stations_IL s

INNER JOIN

(

SELECT site_no,

SUM(rainfall_inch) AS Total_Rainfall,

Month(date_time) as mo

FROM USGS_RAINFALL_TIMESERIES_IL

WHERE ::r:timeRange

GROUP BY site_no, Month(date_time)

) r

ON s.site_no = r.site_no

LEFT OUTER JOIN

USGS_Rainfall_Monthly_Avg av

ON r.site_no = av.site_no

AND r.mo = av.Month_num- Note: I have used Month() function in the SQL since I have had data in a SQL Server instance. For Oracle and PostgreSQL, you might want to use Extract() function; for other database, please refer to the database documentation.
- Define the ::r:timeRange range parameter exactly the same way as we defined the range parameter earlier.
- Symbolize the layer with proportion symbols using the Total_Rainfall attribute.
- Select the layer in the Content pane then
- Click the Vary Symbology by Attributes tab in the Symbology pane.
- Set the following ArcGIS Arcade expression to vary the color when the amount of rainfall during the current month exceeds a station’s historic average for that month:
iif($feature.Total_Rainfall > $feature.Avg_Monthly_Rainfall, 1, -1)

- Go to the Time tab and update the settings to match the screenshot below:

This produces a map like the one below, where stations in red are the ones whose total rainfall for January 2013 exceeded the historic average rainfall for January.

Share and Consume Data in Web Maps
You can do the following:
- Share the map as a map image layer (or map service).
- Consume that on a web application such as ArcGIS Online or a portal map viewer or a Web AppBuilder for ArcGIS application.
- Use the time slider to see the same results.


Article Discussion: