There are many online sources for imagery that can be downloaded and hosted in your organization for your workflows. ArcGIS Online provides a platform for sharing your work through web maps and layers that can be used to convey information or provide opportunities to allow others to create their own visualizations and analysis.
Imagery layers in ArcGIS Online are one type of layer that can be used for visualization and analysis throughout your organization. ArcGIS Living Atlas of the World has a wealth of data that can be visualized in your maps and can provide a quick resource for your work, but what if you have a specific scene or image that you want to keep for your analysis? Perhaps you want to maintain a particular workflow to share in a course you are teaching or as an historic example of an event, where can you find the data that you used? These are just a few of the questions that I have heard when discussing the use of online imagery.
Where do you get the data to create the imagery layer?
There are imagery vendors available to provide access to their imagery in a variety of ways for you to consume or even host on your own site. ArcGIS Living Atlas of the World contains many imagery layers for you to use in your applications. Not all the data found there is available to be downloaded from the original source. However, some of the data, particularly some of the imagery, can be downloaded from the original sources. Once it is downloaded, the imagery can be hosted on ArcGIS Online and shared within your organization.
Hosting the imagery in your ArcGIS Online organization is one way you can provide access and control how that imagery layer is used. For dynamic imagery layers, you can control what aspects of the imagery layer the user can control such as display order, or processing limit. For tiled imagery layers, you can provide users access to a particular image and allow it to be used in analysis. Not all the imagery layers found in ArcGIS Online can be used as you desire and it is important to review their use restrictions and capabilities. Also many imagery layers are always being updated, by downloading a particular image, you can save a ‘snapshot’ that can be used in the future for subsequent analysis or used in an example or lesson.
If you find a dataset that you want to control and ensure is available for analysis, visualization, or any other future use, you can download the data and host it yourself. ArcGIS Online can host imagery layers that provide all the streaming access to imagery your organization.
Imagery sources
Here is a list of sources of imagery data that I have used to download data and create imagery layers for analysis and visualization.
EarthExplorer – United States Geological Survey – Aerial, satellite (Landsat), elevation models, and drone data.
Geospatial Data Gateway – United States Department of Agriculture – LiDAR, elevation models, hydrologic, land cover, quarter quads, soil maps, and topographic.
Copernicus Data Space Ecosystem – Copernicus and European Space Agency – Sentinel satellite data and elevation models
Climate Data Store – Copernicus and European Centre for Medium-Range Weather Forecasts – Climate data (NetCDF & GRIB).
Digital Coast: Data Access Viewer – National Oceanic and Atmospheric Administration – Elevation, land cover, weather data, and imagery.
Earthdata Search – National Aeronautics and Space Administration – Satellite (Sentinel and Landsat), and elevation models.
OpenAerialMap – Open Aerial Map – Unmanned aerial vehicle data (UAV) and satellite.
Each of the links above has specific instructions on how to download data, including usually creating an account. Once you have the imagery data, you were looking for, you are ready to host that data in ArcGIS Online to share with your organization.
Review your data
Once you have your data, you are ready to review it to learn how it should be hosted to maintain the same visualization you are familiar with or whether it contains all the relevant data. In ArcGIS Image Online, choosing the proper raster type and processing template when hosting the imagery is vital to creating the desired imagery layer. For satellite data in particular, the raster type/processing template combination controls the band combination that will be used to display the imagery layer and indicate how many bands are present in the imagery layer.
One of the best ways to get a preview of the raster type/processing template you want to choose for your satellite imagery layer is to open the input data in ArcGIS Pro. Once you have imagery data in ArcGIS Pro, consider what raster product was used to display the image and then review the source raster properties. The available raster products correlate to the available raster bands in the satellite image.

To see the available raster products, follow these steps:
- Start ArcGIS Pro and click the Catalog pane.
- If necessary, establish a folder connection to the location of the image.
- Expand the folder and look for the raster product icon.
- Expand the raster product icon to see the available raster products.
- Consider the available raster product options.
- Add one of the raster products to a map to visualize.
- Review the raster properties of the raster product.
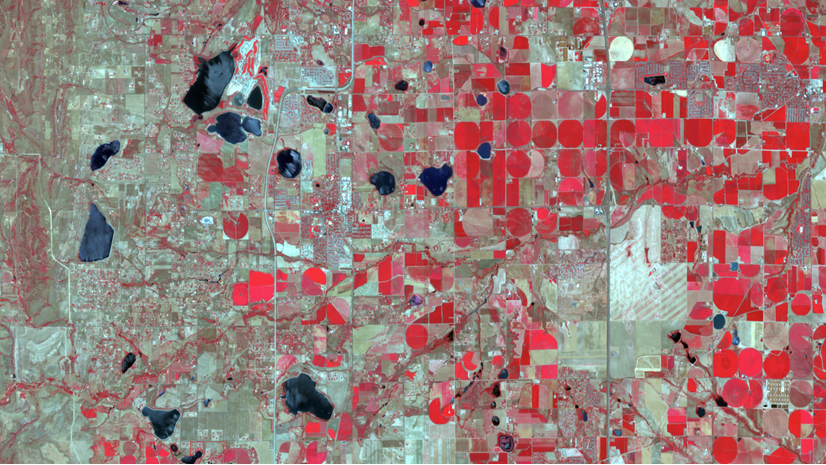
There is always a default raster product for each image. For this image, the default is the ‘Multispectral’ raster product. If you are not sure which raster product was chosen for your image, you can see the prefix on the raster product once you add it to the map. Each raster product uses raster functions to display the image in the map. Some of these functions remove raster bands and apply other functions to create the visualization. The raster properties will indicate the raster bands and the band combination used to visualize the image. Carefully consider which of the raster products contain the appropriate number of raster bands and visualize the image for your workflow.

If you choose a raster type/processing template that is not available for your input data, the imagery layer creation process will fail. So be sure to review the selection when creating the imagery layer. Choosing the ideal processing template for your imagery layer will create an imagery layer with the desired raster bands and display initially in a map in the desired visualization.
To create an imagery layer that can be used and visualized similarly to the way the raster product is in ArcGIS Pro, I will choose an imagery layer configuration of Landsat 8 for the raster type, and a processing template of Multispectral like the default display in ArcGIS Pro. The imagery layer created will then match the visualization and number of raster bands that were present in the raster product when reviewed in ArcGIS Pro. The raster product is based on the available raster bands and metadata.
Create an imagery layer
Once you have reviewed the input imagery, you are ready to create the imagery layer. After choosing what type of imagery layer you want to create, you will have the option to select a raster type. The raster types available during the creation process use the same raster function templates as the raster products to visualize the imagery. Selecting the corresponding raster type when creating an imagery layer will control the default visualization of the created imagery layer.
You can create an imagery layer in ArcGIS Online through a browser in a couple of easy steps. The entire process is outlined in this blog to publish Landsat imagery layers.
Creating a tiled imagery layer with Landsat
The process described in the blog includes the creation of a tiled imagery layer using the Landsat imagery. Once you have hosted the imagery layer in your organization, then you can share the imagery for any of your organization’s workflows.

Conclusion
In this blog, I have shared some sources to download imagery that you can host on your ArcGIS Online organization. The imagery layers created and hosted in ArcGIS Online can be streamed to your applications within your organization to provide the functionality of a local raster. Hosting your own imagery allows you to control how that imagery is used and shared. I hope that you are able to find the imagery for your organization in one of these sites to host the imagery for your workflows. If you want to share your experience, I would like to hear how the process goes for you.

Article Discussion: