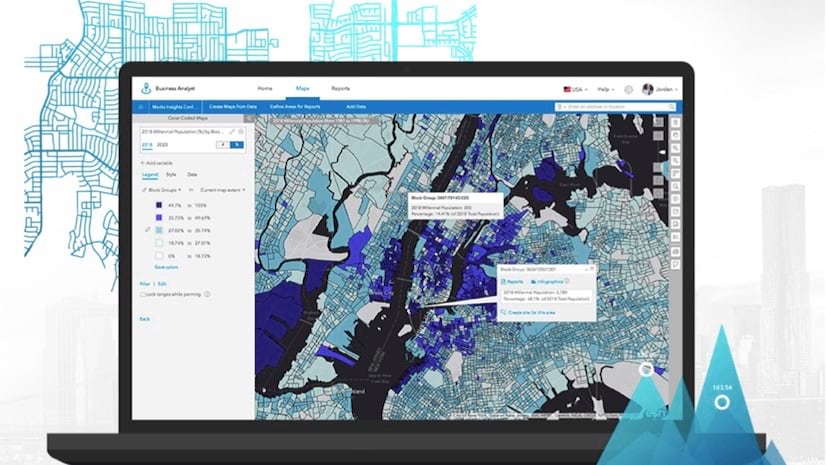
Comparison reports allow you to create reports that compare your sites based on a set of popular categories. These popular categories include population, households, income, and housing as well as customizable reports. Did you know site comparisons can be run in the ArcGIS Business Analyst Web Application and ArcGIS Business Analyst Mobile Application? In this article, let us learn how to do side-by-side comparisons using the Business Analyst Web App as well as the Mobile App, and go over some tips and tricks for viewing and using them.
Create a comparison report in Business Analyst Web App
In Business Analyst, open a project or create a new one. In the project, load a site on the map. From the pop-up site menu, click Comparisons.

Note:
Your site will automatically be compared against the geography levels selected in your preferences. The default geography levels in the U.S. are:
- Whole country (USA)
- State
- County
- Zip code
- Cities and towns (Places)
- Census tracts
The default comparison report is Population Comparison, as shown below:

The comparison report runs and displays data for the selected site. For example, here is how the Population Comparison report appears initially:

Note:
Comparison reports can be viewed in two formats:
- Table – Displays data in a tabular format.
- Chart – Displays data in a bar chart format.
The default view is Table, with the comparison variables listed in the columns and the sites and geographies listed in the rows. In Table view, the rows and columns can be interchanged by clicking Switch rows and columns:

The resultant comparison lists the sites and geographies in the columns, with the comparison variables in the rows:

Click the ellipses near any variable to view options for the variable. You can replace it with another variable, sort, or remove that variable from the comparison.

Click the ellipses near any site or geography to see options:
- Make benchmark – Compare the rest of the sites against the benchmark site.
- Compare with geographies – Reset your current comparison to the default list of geographies in your preferences.
- Replace site – Replace this site with another site by choosing from the list of sites created within this project.
- Sort ascending or Sort descending – Sort the variables in either ascending or descending order, based on the values for the variables in this site.
- Delete – Remove this site from the list of sites in the comparison.

If you want to select a set of variables for comparison, rather than using a default comparison report, click Create new report. If you just want to add additional variables to the existing comparison, click Add variables and go through the data browser to select the variable(s) of your choice. To add more sites to the existing comparison, click Add sites and navigate through the Add Sites wizard.

And once you are done making changes in the comparison, you can:
- Save – Save the comparison report under My Comparisons for future use.
- Print – Print the report in a tabular or chart format.
- Export – Download the report as an .xlsx file on your local machine and share it through different apps.
Comparison settings in the Web Application
Comparison settings can be modified or returned to the defaults in the Business Analyst preferences:

In Preferences, you can change the benchmark style or the default geography levels for comparison.

After modifying the comparison report settings, you can restore these settings to the defaults as well.
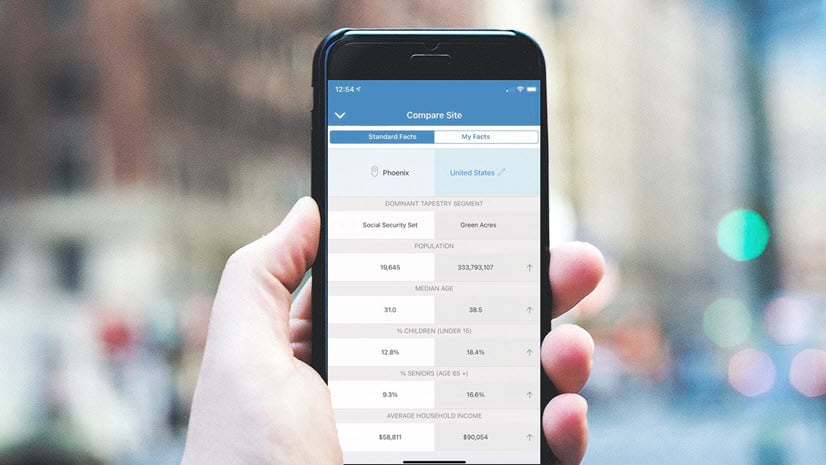
Create a comparison report in Business Analyst Mobile App
In the Mobile App, site comparisons are done, by default, against the entire country. And unlike the Web App, the site is compared to only one geography level at a time—mainly due to the available screen space.

The Mobile App offers two sets of variables for comparisons: the Esri-provided default Standard Facts and the more customizable My Facts. My Facts contains all the variables that you have chosen to see under the comparison page.
Click the Edit button to run the comparison against a different geography level, or even another site that you previously created.

You can change the default benchmark for comparison in the app settings so that your benchmark for any site in future will be state, county, ZIP code, and more.

Note: The benchmark list changes depending on the country you are creating the site in.
For a detailed overview of how comparisons work in the Mobile App, please refer to How to compare sites using ArcGIS Business Analyst Mobile App.
Comparing sites in the Web Application versus the Mobile Application
- More geography levels can be compared against the chosen site in the Web App, while you can compare against only one geography level at a time in the Mobile App.
- Any site can be made the benchmark for comparison in the Web App, while there is only one benchmark geography level or one other site to play around with at a time in the Mobile App.
- You can save, export, or print the comparisons made in the Web App, while there is no save, export, or print option in the Mobile App.


Article Discussion: