Note: This blog article covers the classic Esri Story Maps which are in mature support and scheduled to be retired in late 2025. Story authors are strongly encouraged to use the new ArcGIS StoryMaps to create stories.
For more information about transitioning to the new StoryMaps, see ArcGIS StoryMaps resources. For more information about the transition from classic Esri Story Maps to the new ArcGIS StoryMaps, see Esri Story Maps: Now in mature support.

A presentation allows you to tell a sequential story with information in a map, and is composed by saving interactive map slides. Each slide can use different views of the map, including different basemaps, operational layers, map locations, visible pop-ups, and titles. You can even set your presentation to autoplay when it’s opened.
Presentations can also be embedded in web pages or used inside some Story Maps. Follow these these steps to include a presentation in a Story Map Journal.
1. Save your presentation and map.
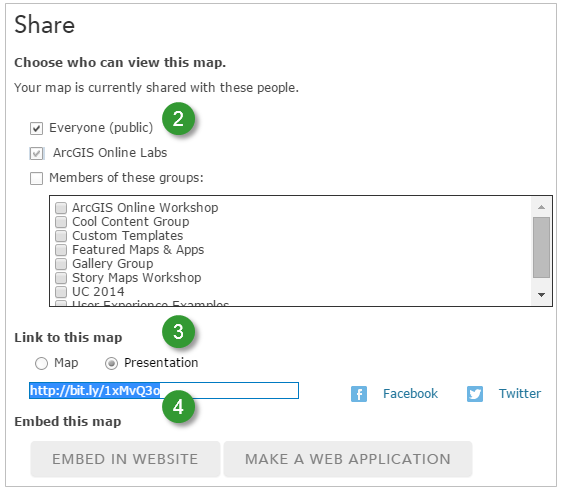
2. Share your map publicly.
3. Choose Presentation under Link to this map.
4. Copy the link.
To add a presentation to the Main Stage Content:
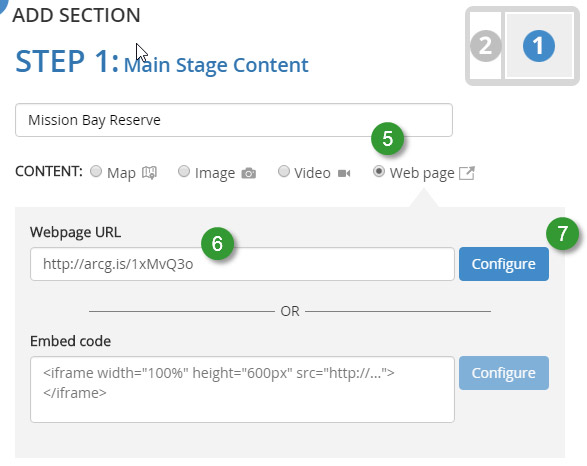
5. Choose Web page under Main Stage Content.
6. Paste the URL from Step 4 into Webpage URL.
7. Click Configure
8. For best results choose Fill from the Position options.

To add a presentation to the Side Panel Content:
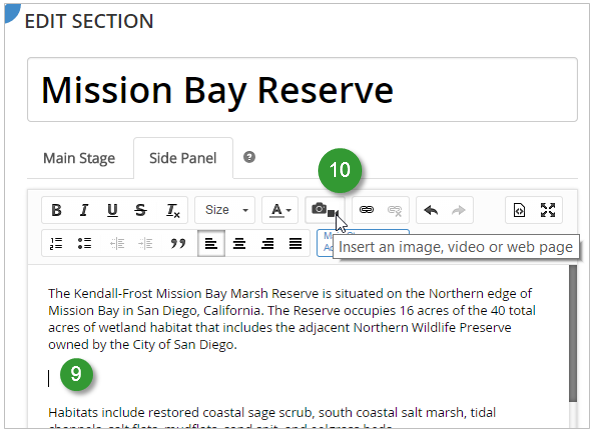
9. Insert your cursor at the location to add the presentation.
10. Choose Insert an image, video or web page.
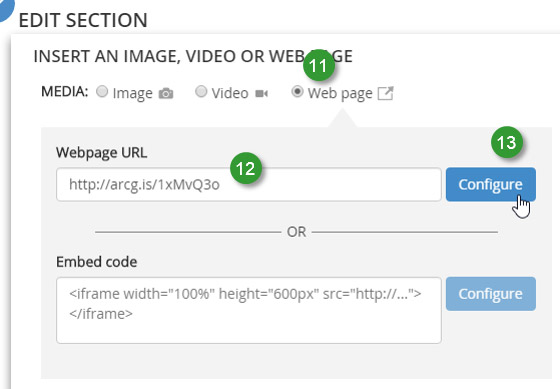
11. Choose Web page.
12. Paste the URL from Step 4 into Webpage URL.
13. Click Configure.
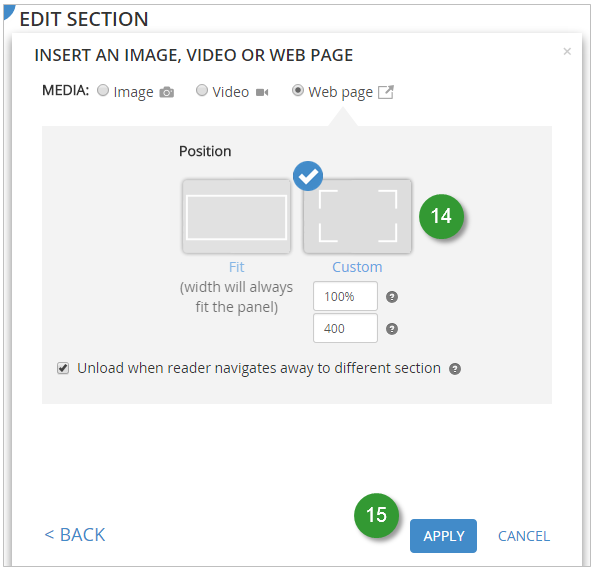
14. For best results choose Custom from the Position options. Use 100% for the width (to fill the Side Panel width) and choose an appropriate height.
15. Click Apply. Then Save your changes.
In the examples shown below a presentation has been added to the Main Stage (top) and Side Panel (bottom).


For more information
This post was originally published on November 18, 2014, and has been updated.

Commenting is not enabled for this article.