The 10.8 version of ArcGIS Enterprise includes global navigation for Sites users.
We’re proud to see how you’ve used ArcGIS Hub to keep everyone informed with data for smart-decision making.
By turning on this new capability, sign-in and user profile are moved from your site’s header to a thin bar at the top of your site (without global nav turned on, sign in disappears). Global nav also includes a new navigation menu and access to our recently enhanced search experience.
Here’s how you can make the most of this capability.
Get more room for branding
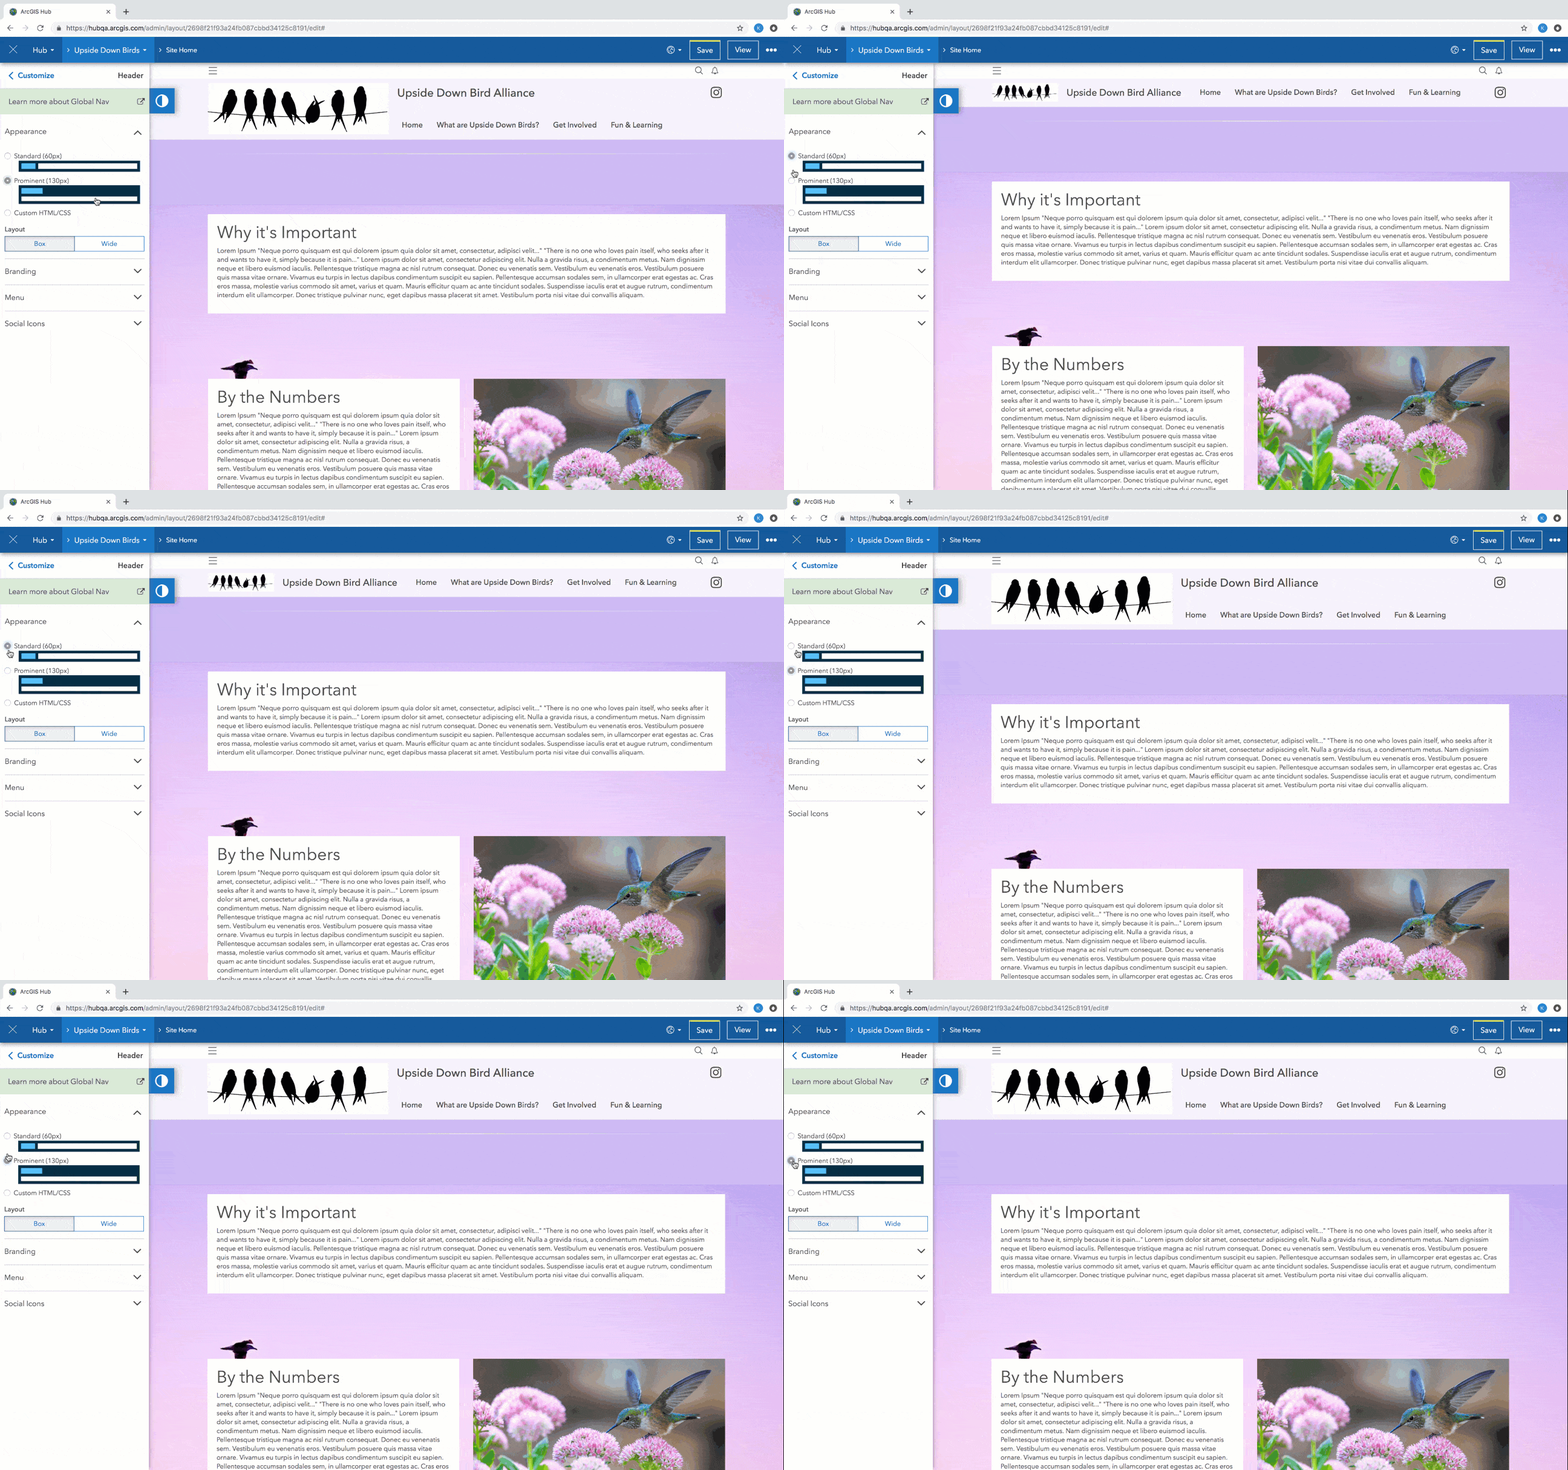
1. Choose your design
Pick from the following new options to configure a header that’s right for you. No HMTL/CSS required.

2. Enter a name
In the Branding section, name your site. This could be anything from the name of your organization, to something unique to your team like a project title.
3. Add your logo.
Upload your own or provide a link to a hosted image (vector file types such as an .SVG scale well). We preserve the aspect ratio of your image based on the header layout option you choose. Want to adjust how your image looks? If you’ve uploaded your own, you can crop it right in the Customize side panel.
No logo? Simply turn off the logo option and let your site name do all the talking.
Create a theme
You can control the color of your site’s header and global navigation in the Theme section of the Customize panel.
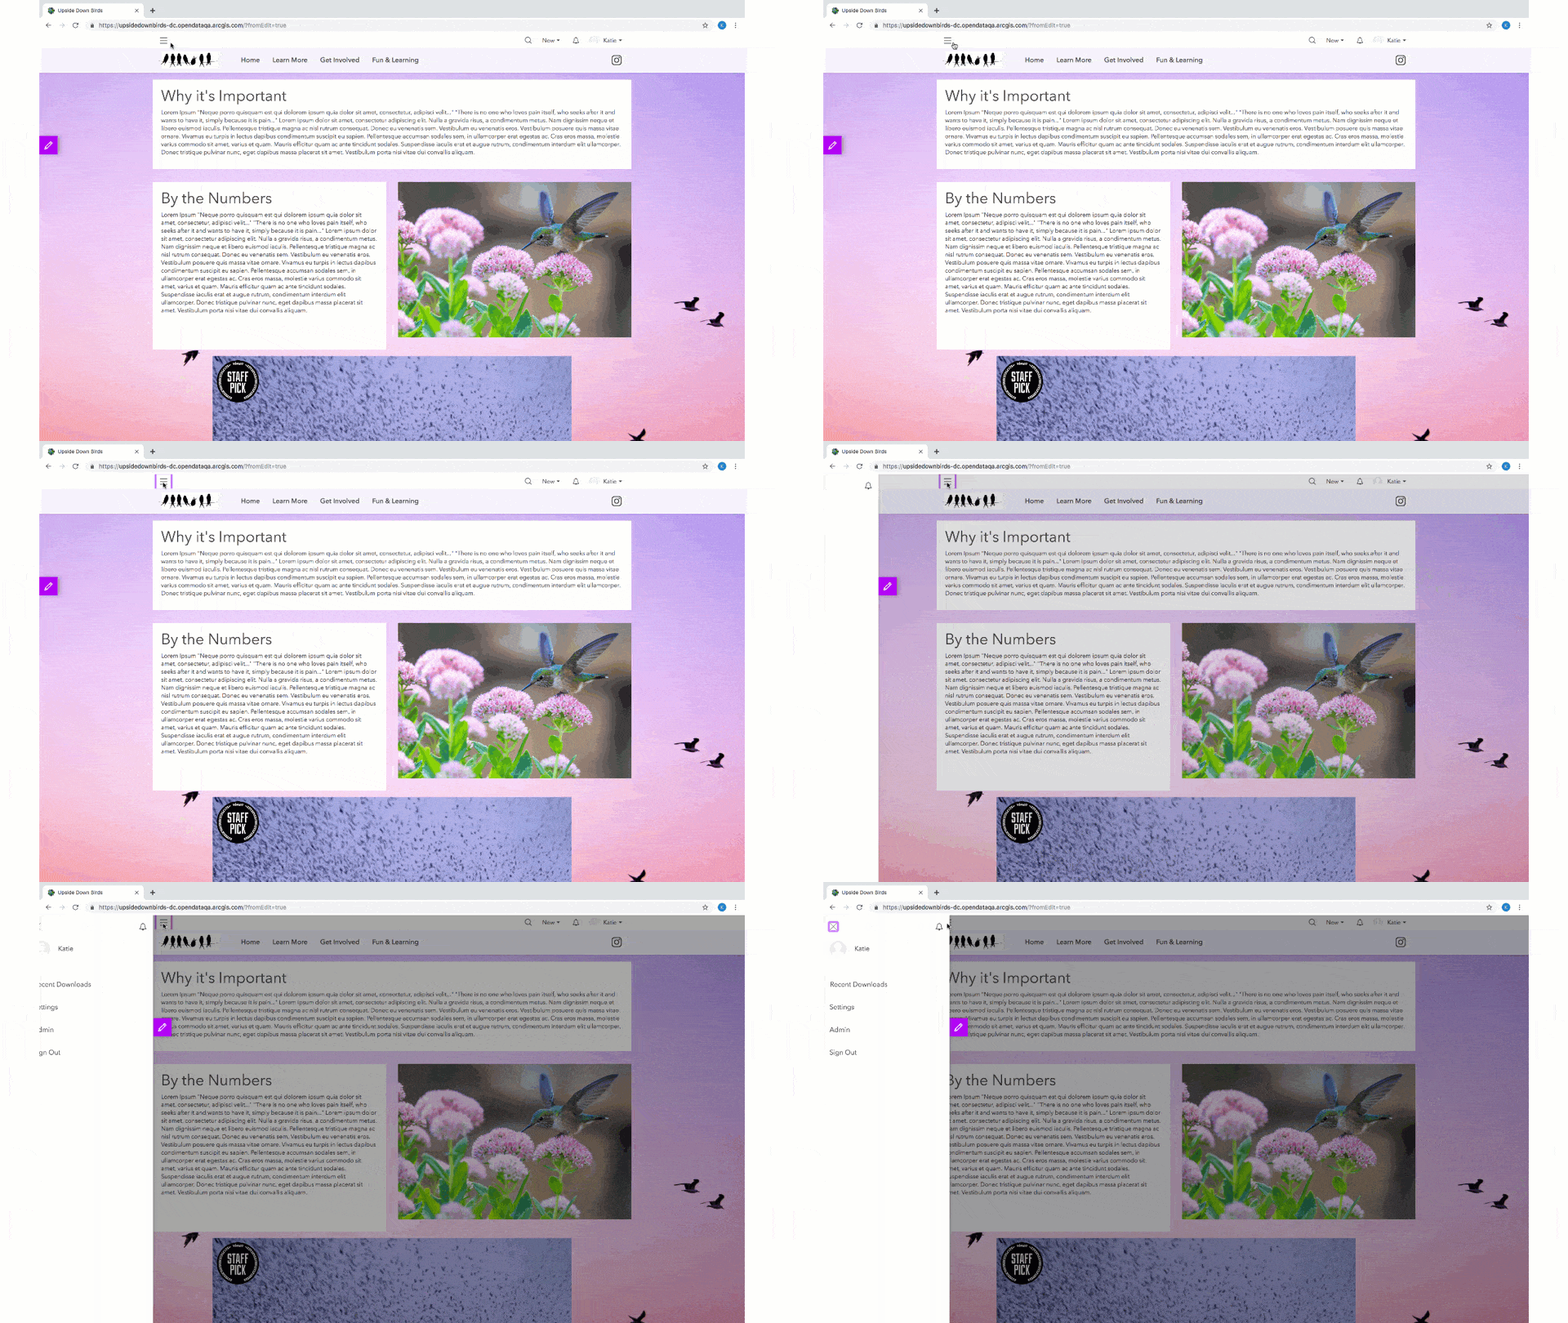
The global nav menu (a side panel that expands whenever you click the first option the global nav bar) is part of global navigation. This means that whatever color you choose for your global navigation background color and text color will be applied to both the global nav bar and the global nav menu.

Add your own menu links
Menu links are an easy way to create a holistic web experience. Here are some examples:
- Work for a city government? Share a link to a recent press release.
- Using pages to keep things organized? Add them to your menu so that people can navigate to a specific department or area of focus.
- Want input? Link to a survey so that the option to provide feedback is front and center.
Click Menu under Header on the Customize panel to get started. You can even rearrange the order in which they appear by dragging and dropping a link to a new spot.
Connect to social media
We share content everywhere. That’s why we’ve made it simple to link to social media platforms so you can extend your reach.

It’s as simple as clicking a toggle and pasting a link for Facebook, Twitter, or Instagram.
Think mobile
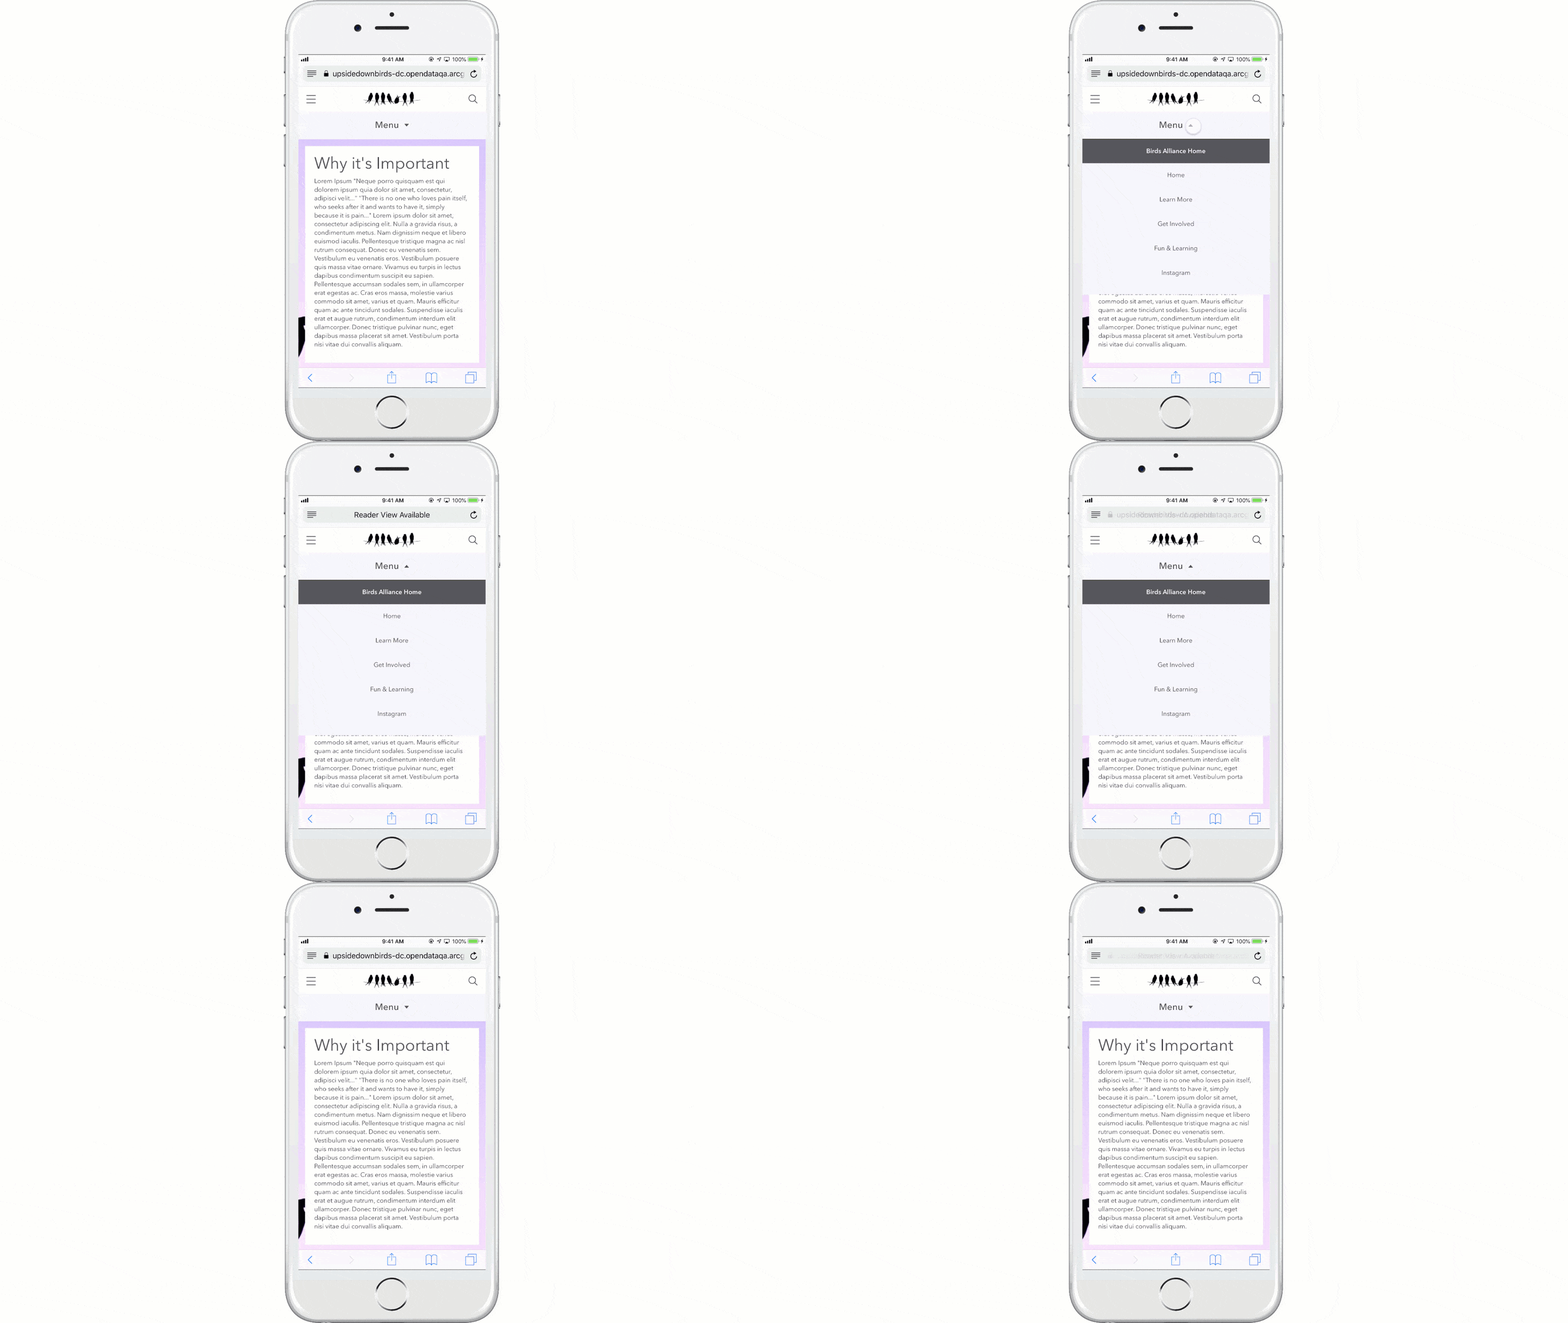
People are increasingly relying on mobile phones to find answers to questions anywhere, anytime. Don’t worry. We ensure that global nav and your header transition seamlessly on mobile. All you have to do is provide a short name and make sure that if you’re using a logo, it’ll appear on both a light or dark background. Here’s why:
If you’ve added a logo to your header, it will appear in the global nav bar when viewed in mobile. This means that if you have a light-colored logo and a light global nav background, there will most likely not be enough color contrast for your logo to be accessible.
If you have both a name and logo in your header, short name is very important for ensuring that your site’s title does not get truncated.

Get Started
Open up an existing site or create a new one (the global nav capability will be on by default for any new site you create).
- Sign in to hub.arcgis.com or your organization’s Portal.
- Open your site in edit mode.
- Open the Customize panel.
- Click Settings.
- Click Capabilities.
- Click to toggle On/Off Global Navigation.
- Click Save.
For more information about global nav and how it affects existing and new sites, read this GeoNet post.
Where do we go from here?
We’re focused on creating a collaborative space for you and your team to explore the many possibilities ArcGIS Hub has to offer. From managing internal projects to connecting with your community through surveys and events, we want to make it easy for you to make things happen. That’s why we have the ArcGIS Hub User Lab so that we can learn more from you on how we can improve ArcGIS Hub. For more information, check out this blog post.
Interested in receiving our monthly e-newsletter? Click to sign up now.


Commenting is not enabled for this article.