If your organization used ArcGIS Hub (formerly called ArcGIS Open Data) to build a website prior to 2016, we recommend that you transition your site to the current hub framework. While we have kept these systems online over the last 3 years to afford our customers time to make a new site in ArcGIS Hub, we are now shutting off the legacy system on September 8th, 2020 for security reasons.
In this article
Check your site for updates
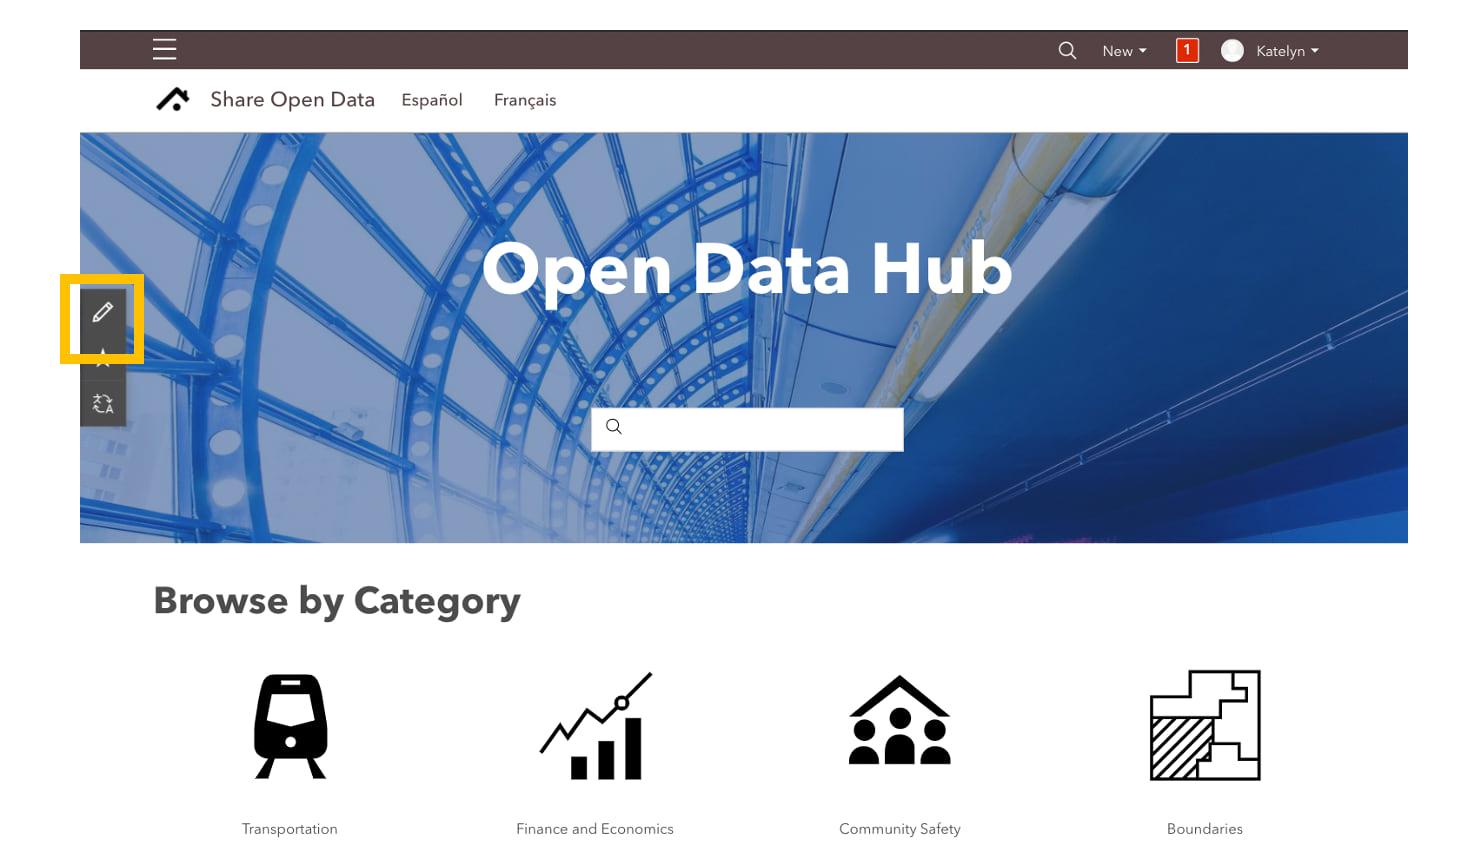
To tell if your site is using the outdated version of ArcGIS Open Data, ensure that you are signed in to ArcGIS Hub with editing rights and open your site in a new browser window. If you see the new edit button (the pencil), your site is up-to-date, meaning that you created your site with the current version of ArcGIS Hub.
You can also tell by looking at content views. Each item, such as a dataset or web map, that you’ve shared on your site has it’s own content view. To open an item’s content view, click on the item in the site’s content library or in search results after making a search on your site.

The comparison above shows (A) the current content view on a Hub site and (B) an older content view when Hub sites were called ArcGIS Open Data.
Transitioning to the hub framework
Today, you can access ArcGIS Hub by signing in to your organization’s subscription to ArcGIS Online. Anyone with the recommended administrative privileges can create and share sites, including open data sites. The following steps will help you migrate your content to a new hub site.
1. Create a new site
To create a new site, sign in to ArcGIS Hub and follow these steps.
Once you’ve landed in the site editor, you’re ready to get started.
2. Edit site layout
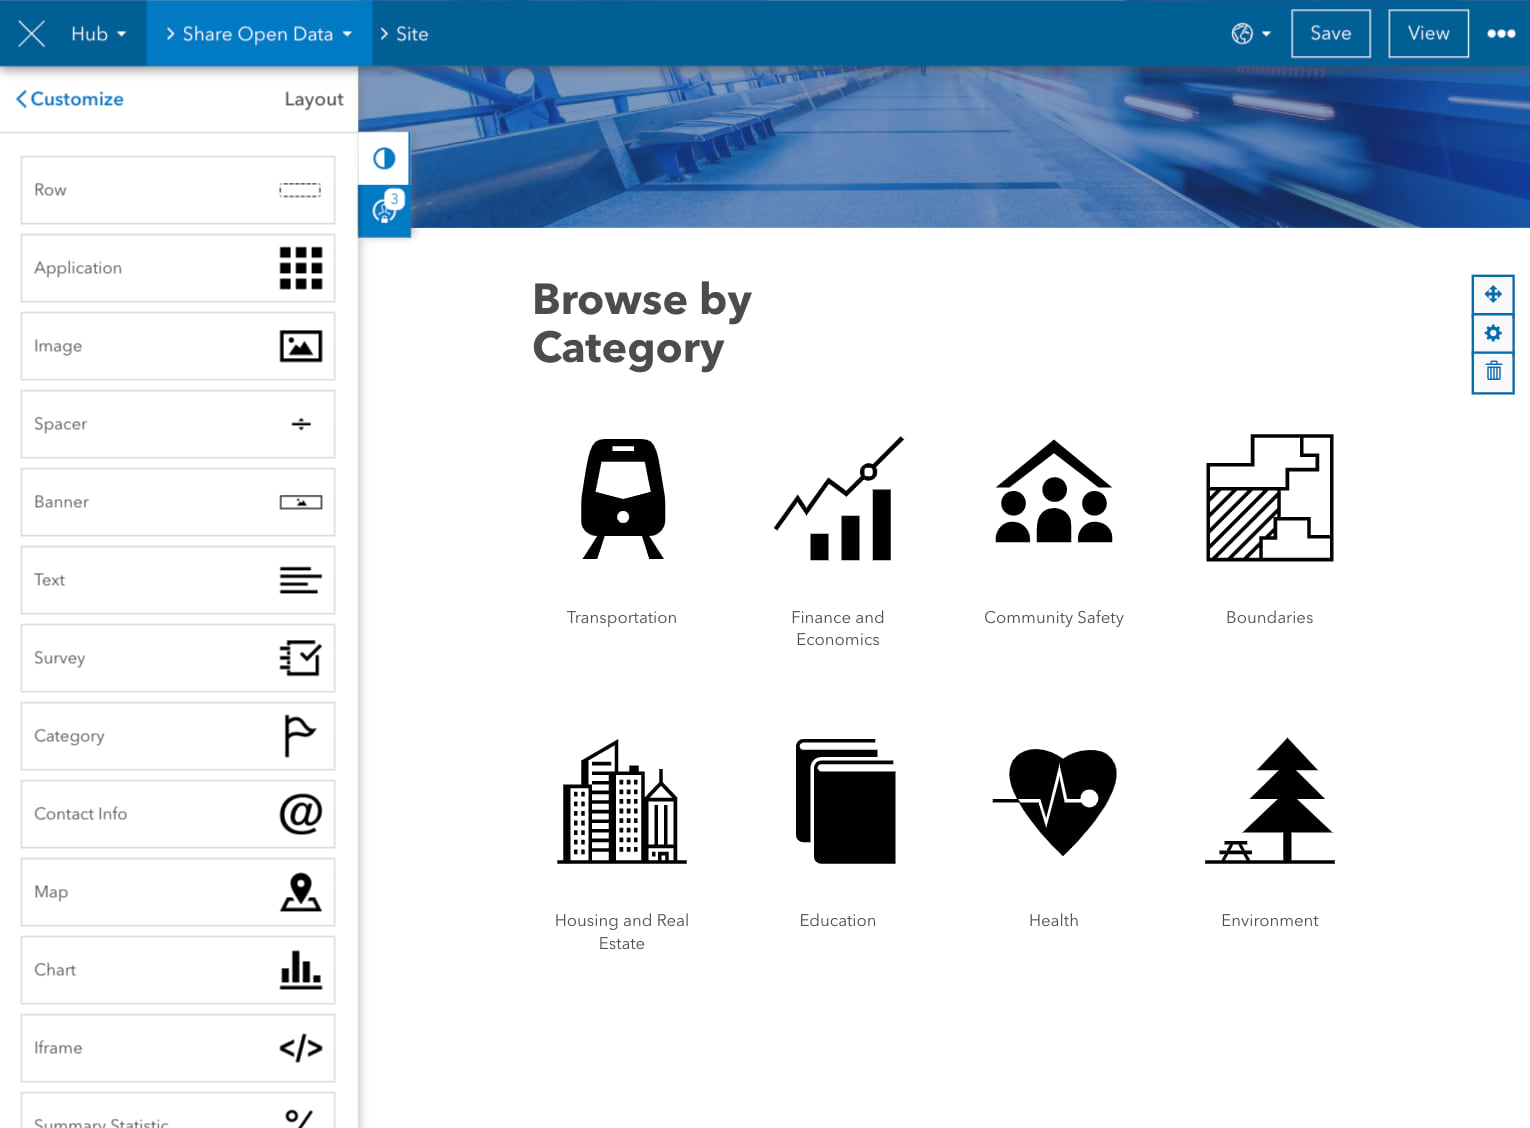
After you’ve created your site, you can begin editing its layout and configuring its settings using the site editor. You can get started by branding your site with your organization’s color and logo.
Certain layout cards, including the gallery and category cards are designed to help you quickly feature content on your site; no HTML required. Once you’ve added content, you can return to your site to continue editing. Watch this quick tutorial on editing your site’s layout and refer to the documentation for additional information.
3. Add content to your new site
Adding content to your site means that you’re adding items, such as web maps and datasets, through your site’s Content Library. You can find a link to the content library by clicking the blue navigation breadcrumb with your site’s name. After you’ve added content, you can feature it on your site, such as through a gallery card. Content is discoverable in your site’s search results.
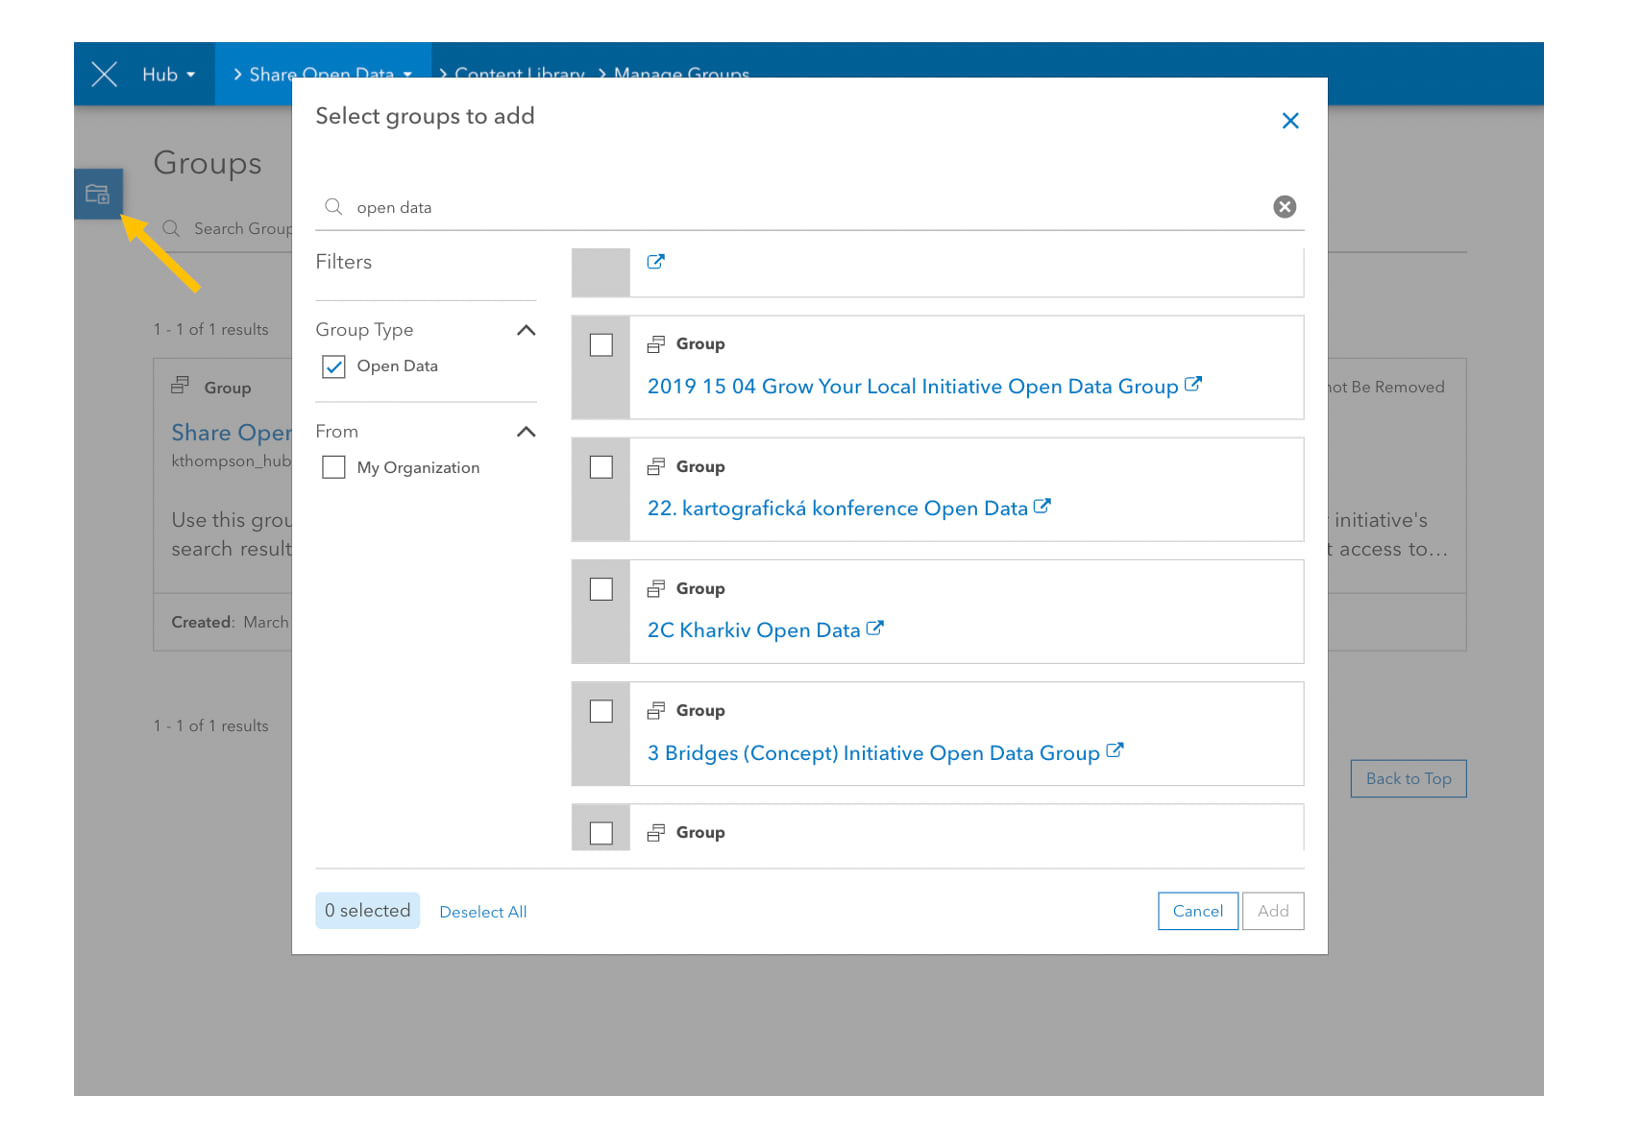
Since you already have your former site’s data organized into groups, you can use the Groups Manager to add content to your site in bulk. To get started, again click the blue navigation breadcrumb with your site’s name choose Groups Manager.

Here you can see the content associated with your site’s core group and manage supporting groups. Click the Add Groups button and choose your former site’s open data group and any additional groups that you want to add.
NOTE: You can update your site with new content by sharing new items with your site’s existing groups by using the sharing toggle on the side panel. For more information, see Adjust sharing controls.
4. Test that your new site is working as expected
Once you have made edits to your site’s layout and added content, you can test to see the changes. Confirm that your content was transferred successfully by clicking Save and then View in the edit navigation bar. Your should now see your live site.
Next, sign out and enter a test query in your site’s global navigation search bar. If your content is shared publicly, you will see items listed in the search results. If the data are shared internally, only people with whom the items are shared can view them in search results. To check this, sign back in, view your site, and search again.
5. Update the new site’s URL with the old URL
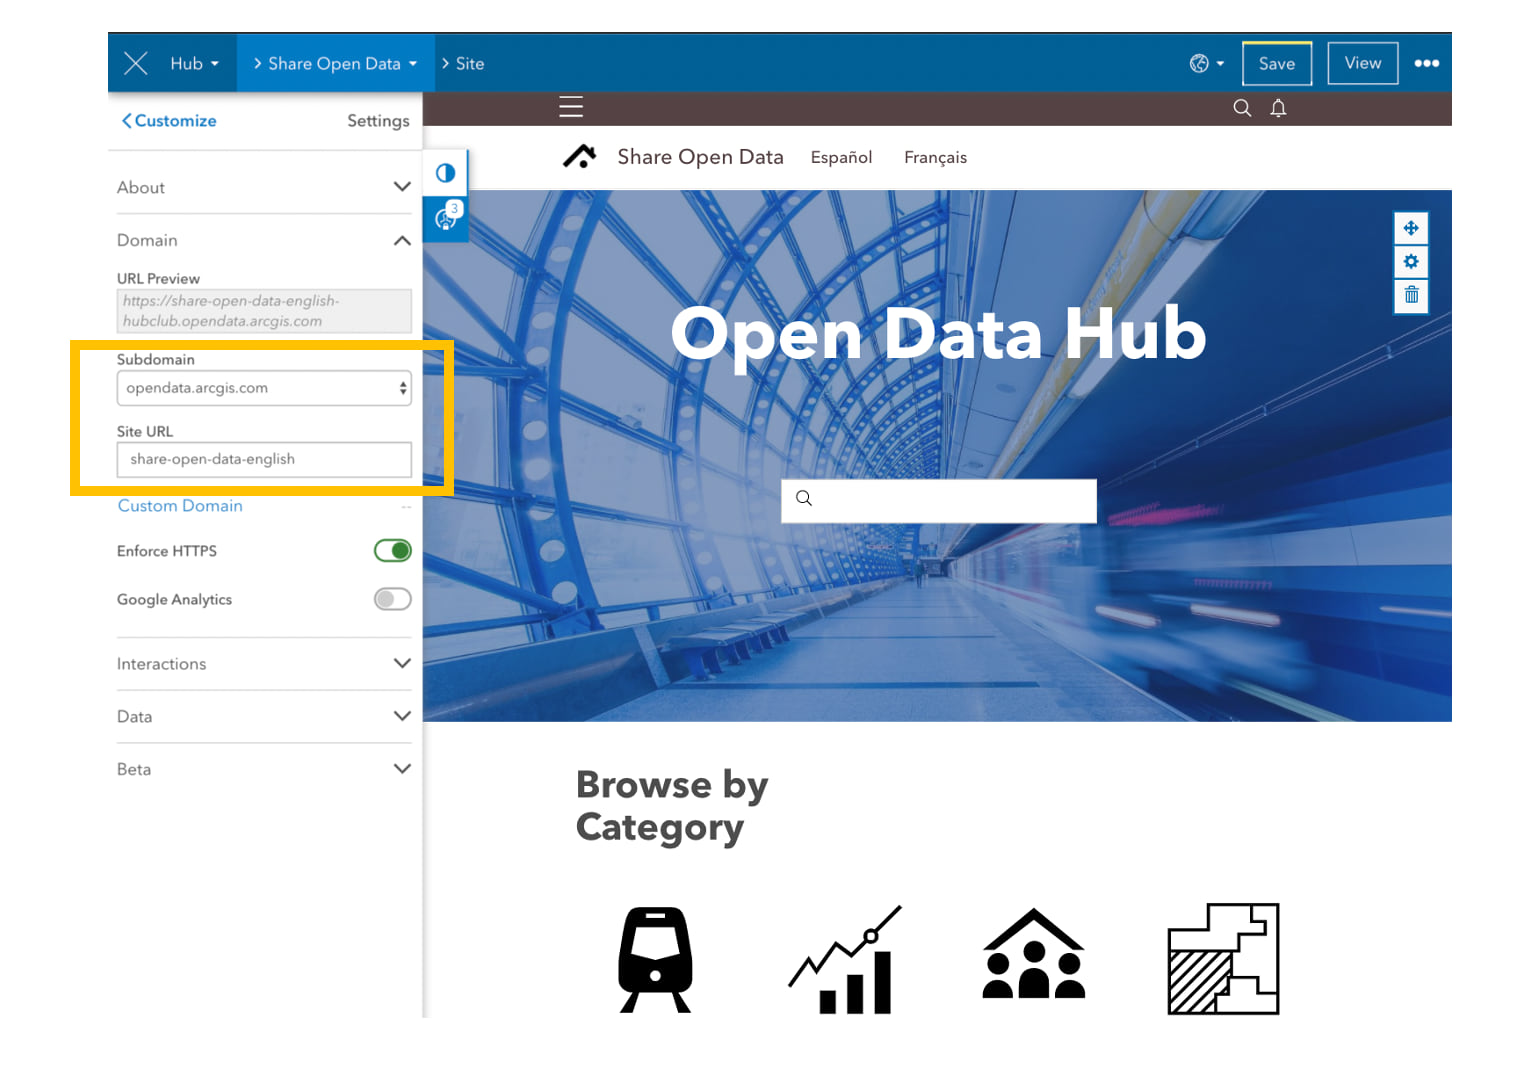
To redirect visitors to the correct site, you can update the subdomain of your new site with the subdomain previously used on your old site. To do this, click Settings on the side panel in the site editor. Then, click Domain.
Under Domain settings, you’ll find the options to change the subdomain of your new site’s URL to opendata.arcgis.com (the subdomain automatically applied to earlier sites). Lastly, paste the slug from your old site into the Site URL field. For more information, see Configure URL documentation.
We will continue to serve the exact same API for new sites at the location used for earlier addresses.
6. Save your changes
To save your changes to settings, again click the Save button in the top right. To share the site with the public, click the visibility drop-down menu next to the Save button and click Public. You can then click the View button to see the live view of your site.
Additional resources
For more information on setting up a new Hub site, see a Quickstart Guide to ArcGIS Hub Basic. Questions? Reach out to us on GeoNet with any questions or comment on this post.


Article Discussion: