With the April 2021 release of ArcGIS Online, we are very excited to announce that you can now schedule an ArcGIS Notebook to run automatically, with no user interaction, at a set time or on a recurring basis. This is exciting to many users who want to automate routine tasks, execute large or lengthy processes outside of work hours, or regularly update datasets. Some example patterns of use include:
- Inspecting all items in the ArcGIS Online organization, and reporting any items that are missing required metadata (e.g. Description, Terms of Use, Credits, Tags, etc.).
- Training a machine learning or deep learning model overnight, to save time and compute resources so you can be more productive during working hours.
- Downloading data from an online source that updates frequently, and cleaning, wrangling, and otherwise engineering the data for use in an analysis workflow or to update a dashboard.
In the example below, we’ll follow the third pattern. We’ll schedule an ArcGIS Notebook to run once a day, shortly after an online data source updates. The notebook downloads a CSV file of Coronavirus statistics by county in the US from a URL, does some data engineering to clean, geoenable, and summarize the Coronavirus statistics for each county, then publishes the data as a hosted feature layer in the organization.
How to use Notebook Scheduling?
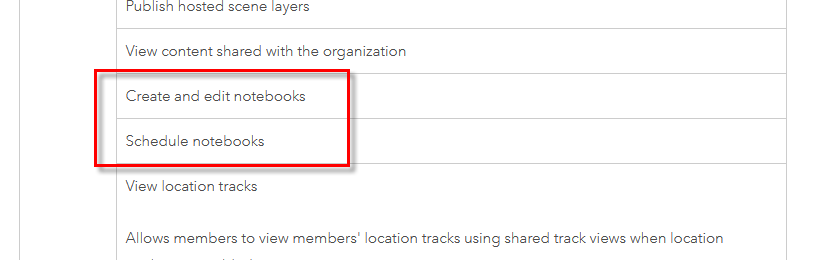
First things first. To use notebook scheduling, you need to be a Creator or GIS Professional user type in your ArcGIS Online organization, and you need to have either an Administrator role or a custom role in which you’ve been granted privileges to create and edit notebooks, and to schedule them.
When you’ve built a notebook that you are ready to schedule, you create a Task to schedule it’s execution.
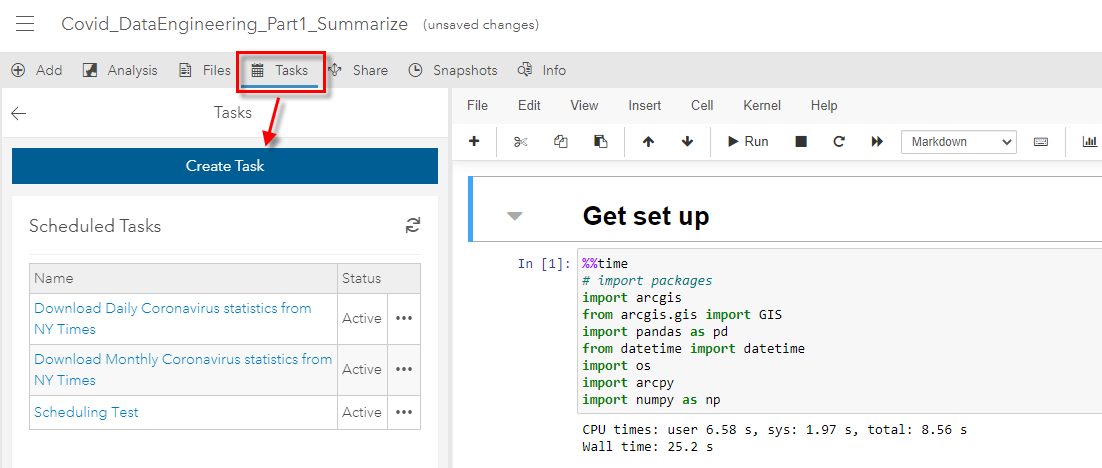
Note: If you’ve created a new notebook, you will only see Tasks on the top ribbon after you’ve saved the notebook. If you’ve imported a Jupyter Notebook as an item via a .ipynb file, you have to go to the Item details page and associate the notebook with a runtime to see Tasks on the top ribbon.
You can see that I’ve already created a few tasks in this notebook. Each notebook can have multiple tasks associated with it, and they can start and stop at different times, repeat at different intervals, and have different parameters.
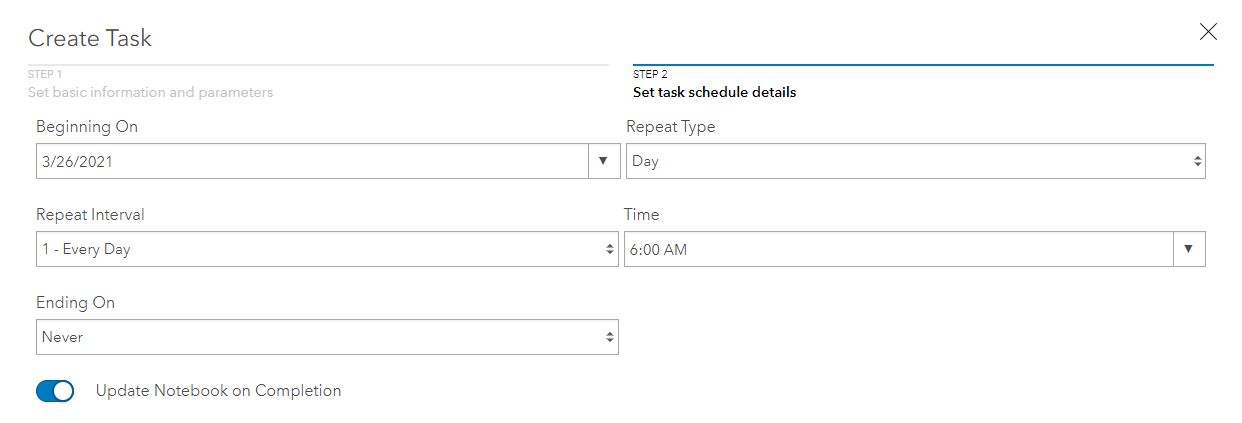
When you create a task, the first step is to name it and optionally create parameters to pass into the notebook. We’ll cover scheduling parameters in more detail in this blog post. The next step is where you specify the details of the task schedule—when it starts, how often it repeats, when it ends, etc. You have many options for the repeat frequency of a task, ranging from every 15 minutes, to once every 6 months.
I’ll set up my task to execute the notebook every day at 6:00 AM. This should provide me with a cleaned, up-to-date feature layer of total US Coronavirus cases, by county, each morning when I sit down at my desk to start work.
That’s it! You can close the notebook, close ArcGIS Online, close your browser, shut down your computer—it doesn’t matter. The notebook will execute behind the scenes automatically at the time you’ve specified, and you can come back and see your results/outputs later.
After the scheduled notebook has executed, you can view your results from the Tasks pane. Here, you can edit, pause, or delete existing tasks, see which ones are active, and view the results of all your scheduled notebooks. These details show you the cadence at which the scheduled tasks executed, whether the execution was successful or not, and they allow you to see a read-only HTML preview of each completed notebook.
Important things to remember
1) Make sure the notebook runs start to finish without user input before scheduling it
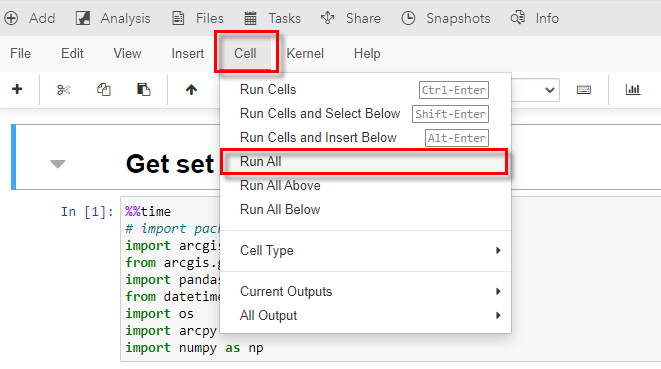
Because these scheduled notebooks run without user interaction, it is important that they are constructed such that they can run start to finish without any user interaction. In other words, there are no code cells that will error out due to missing user input or other issues such as output files already existing. To check this, we recommend that you run all cells manually in the notebook at least once prior to scheduling it.
2) You can have five notebook tasks running concurrently
If there are more tasks scheduled to start while five are already in progress, the upcoming tasks will fail.
3) Notebooks can only be scheduled by the notebook owner
A notebook can only be scheduled by the person who owns it. Not even Administrators can schedule a notebook on someone else’s behalf—they have to be transferred ownership of that notebook item.
4) All scheduled tasks will include a read-only view of the results
This read-only HTML preview can be very helpful for viewing intermediate results in the notebook, or for troubleshooting errors that caused scheduled notebooks to fail.
5) Scheduling notebooks consumes credits
In a previous blog article, we described the ArcGIS Online credit model for using notebooks in “Interactive Mode”, which is when a user is directly interacting with the notebook by typing code and executing cells.
The ability to execute notebooks in “Scheduled Mode” can add value to organizations in terms of time, resources, and efficiency. As such, the credit model is slightly different than notebooks in “Interactive Mode”. All scheduled notebooks consume credits, and this consumption is based on the amount of time it takes to complete a task. For a review of the pricing for both “Interactive Mode” and “Scheduled Mode”, please refer to the Understand credits topic in the ArcGIS Online documentation.
Join the GeoNet Community
Whether you want to talk about scheduling notebooks, or ArcGIS Notebooks in Online, Enterprise, or Pro in general, please join the ArcGIS Notebooks community . Ask questions, share ideas, and get help from your fellow notebook users. You can also visit the ArcGIS Notebooks product page for product level information and quick links to resources.

Thanks for putting this blog together. I am attempting to follow along and just getting my feet wet to Notebooks.
Just to provide background on my experience so far I was able to successfully create the table_item and table_fs directly from the URL as expected, but the table_user just hung so I had to add the CSV linked in the blog and worked.
Any recommendations on getting past this step? I have created the tables and replaced the Item IDs but the next part of the code throws an error. My org is setup to allow SAML login. Could that be impacting the notebook and I need to be using a regular built in account that uses AGOL UN/PW? Thanks for the help.
#Connect to the GIS environment
gis = GIS(“home”)
NameError Traceback (most recent call last)
in
1 #Connect to the GIS environment
—-> 2 gis = GIS(“home”)
NameError: name ‘GIS’ is not defined
Excellent article!