This article was originally published on January 21, 2021 and has been updated.
If you’re an administrator of your ArcGIS Online or ArcGIS Enterprise organization, member management is likely an important part of your work. To ensure you have enough time for everything on your to-do list, efficiency is key.
The organization page Members tab provides a central location for managing members. No matter what member management task you are facing, ArcGIS includes time-saving capabilities such as filters and bulk actions to help you get the job done.

Video
For a demo of the capabilities covered in this blog article, check out the following video:
Note: This video features an ArcGIS Online organization, but most of the capabilities shown are also available in ArcGIS Enterprise.
Assign groups
Suppose you want to add mobile workers in your organization to a group you created for managing mobile staff and data collected in the field.
To get started, sign in as an administrator, click Organization at the top of the site, and click the Members tab to see a list of members in your organization.

Now take advantage of the filters on the left to find the mobile workers. Under User type, select Mobile Worker to filter the list of members.

With only the mobile workers listed, you can quickly add the mobile workers to the group.
Check the box at the top to select all the mobile workers in the list. Then go to the More menu and click Manage group membership.

Search for the group, select it, and click Save.

The mobile workers are now members of the field collection group.
If you’re an ArcGIS Online administrator, you can now move on to managing credits. If you’re an ArcGIS Enterprise administrator, move on to deleting member accounts.
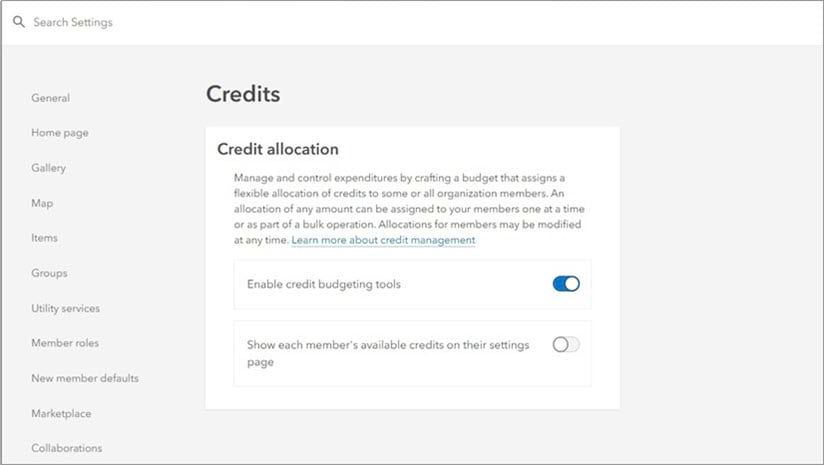
Allocate credits
Credit management is a common task for many ArcGIS Online administrators, but it doesn’t have to be a time-consuming one.
As members of your organization complete their daily work, the number of credits allocated to them may become low. Before you start receiving a slew of email requests for more credits, you can proactively update the credit allocation for members who are running low.
Again, the filters on the Members tab are your most trusted assistants. If necessary, start by clearing the existing filters and selection to return to the full list of members.
Now expand the Credits remaining filter. You want to find members who have fewer than 300 credits remaining so you can increase their allocation to 500 credits. Under Less than, type 300 and press Enter to filter the members list.

Select all the members in the filtered list using the check box at the top and click Manage credits.

Increase the credit allocation and click Save.

Delete member accounts
For organization administrators, a common task is deleting member accounts and managing the deleted members’ content, groups, and add-on licenses.
For example, suppose several interns will soon be leaving your company and their accounts must be deleted. During their internships, the interns created valuable content items that you want to maintain in the organization after the interns leave. The interns were also assigned add-on licenses that need to be revoked to make them available for other members.
Fortunately, ArcGIS Online and ArcGIS Enterprise allow you to manage member licenses and content in a single bulk action while deleting the members’ accounts. In addition, if your organization has set up member categories, you can use the member categories filter to quickly find the interns who are leaving the organization and then proceed with deleting their accounts.
First, filter the members list using the member categories filter. In this case, you want to find interns in the Conservation department.

Now select all the interns in the filtered list using the check box at the top, click the More menu, and click Delete members.

You have the option of deleting the interns’ content or transferring the content to another owner.
Note: When deleting members in bulk, any groups owned by the members are automatically deleted; there is no option to transfer them to a new owner. To keep these groups in the organization, you must transfer them to a new owner before deleting the member accounts. You can see a list of group owners in the organization by clicking the Status tab on the organization page and clicking Groups in the status dashboard.
Transferring the interns’ content items to another owner will allow the organization to continue maintaining the content moving forward, so you’ll leave the first option selected and click Next.

Now specify a new owner and folders for the members’ content. You can create one folder corresponding to each intern who owns content or have all the content transferred to a single folder.

Click Delete members.
In just a few clicks, you removed all the interns from the organization and managed their content and licenses.
The content owned by the interns is reassigned to the owner you specified. All add-on licenses assigned to the interns are automatically revoked and are now available to reassign to other members.
Learn more
To learn more about managing members and other organization administration tasks, see the resources below.
ArcGIS Online:
- Manage members—ArcGIS Online help topic.
- ArcGIS Online resources—The latest resources for ArcGIS Online, including tutorial series, blog articles, and help documentation.
- Administer ArcGIS Online tutorial series—Videos, tutorials, and blog articles show you how to configure ArcGIS Online to meet your requirements for mapping, security, authentication, and privacy.
- ArcGIS Online Implementation Guide—Essential tasks and best practices for setting up ArcGIS Online.
- ArcGIS Online Community—Exchange ideas, solve problems, and build relationships.
- Use member categories to manage group membership—Related blog article about using member categories to bulk assign members to groups.
ArcGIS Enterprise:
- Manage members—ArcGIS Enterprise help topic.
- Manage content in ArcGIS Enterprise tutorial series—Videos and other resources that show you how to manage content in ArcGIS Enterprise.
- ArcGIS Enterprise Community—Exchange ideas, solve problems, and build relationships.


Commenting is no longer enabled for this article