2024 Esri User Conference
The ArcGIS for Microsoft 365 team is grateful to everyone who met with us at the showcase area or joined our sessions in person or digitally during the 2024 Esri User Conference. Thank you for your great questions and insightful feedback, which will help shape the future of ArcGIS for Microsoft 365.
For those who missed the ArcGIS for Microsoft 365 Overview session or need a refresher, we are sharing a link to the session recording.
Note: This recording is available only for digital and in-person UC 2024 attendees.
Quick Links to FAQs
To assist you in accessing knowledge from the UC, we have answered the frequently asked questions about the ArcGIS for Microsoft 365 products. Use the links below to navigate to sections of interest.
- ArcGIS for Microsoft 365
- ArcGIS for Excel
- ArcGIS for SharePoint
- ArcGIS for Teams
- ArcGIS for Power BI
- ArcGIS Connectors for Power Automate
ArcGIS for Microsoft 365
What are ArcGIS for Microsoft 365’s capabilities?
ArcGIS for Microsoft 365 enables you to easily integrate spatial and business data, allowing your organization to analyze and visualize spatial data, foster map-based collaborations, and bring spatial capabilities into your automated processes.
You can analyze, map, and visualize spreadsheet rows using ArcGIS for Excel. Enhance document management practices with geotagging and geosearching capabilities while spatially enabling your lists in ArcGIS for SharePoint. Broaden your organization’s business insights with location intelligence in ArcGIS for Power BI. Search, share, and collaborate with ArcGIS items in ArcGIS for Teams. Finally, extend automated workflows with spatial capabilities using the ArcGIS Connectors for Power Automate.
How to get started with ArcGIS for Microsoft 365 components?
The Get Started with ArcGIS for Microsoft 365 blog post and documentation provide detailed instructions for you to begin using the products effectively.
Can I use ArcGIS for Microsoft 365 components without an ArcGIS identity?
Yes. There is a standard experience that allows limited functionality across the components.
ArcGIS for Excel and ArcGIS for SharePoint can map data that has latitude and longitude coordinates. ArcGIS for Power BI can locate data leveraging addresses, boundaries, or latitude and longitude coordinates. ArcGIS for Teams will allow you to search and view the millions of maps, apps, and layers available across the global ArcGIS system.
Can I install all the ArcGIS for Microsoft 365 components at once as a bundle? I noticed an option for this on the Microsoft App Store. What is the difference between the installations?
The ArcGIS for Microsoft 365 apps cannot be installed as a bundle. The applications have different approaches for installing the App/Add-in, and unfortunately there is not a single way to deploy them.
The ArcGIS for Microsoft 365 listing in the app store allows organizations that do not have ArcGIS to purchase a package that provides a number of credits and named users.
Is the ArcGIS for Microsoft 365 Product Family being retired or deprecated?
The ArcGIS for Microsoft 365 product family is not being retired or deprecated. The confusion may be arising from the retiring the product family’s predecessor, ArcGIS Maps for Office. The components are actively maintained and enhanced with no plans for deprecation.

ArcGIS for Excel
Access and Licensing
How can I install ArcGIS for Excel? Are there step-by-step instructions available for this installation process?
There are multiple ways ArcGIS for Excel Online can be added to Microsoft Excel. An organization may allow individuals to manage the download and installation of Excel add-ins from Microsoft AppSource. Organization-approved add-ins can be deployed via a Centralized Deployment in the Microsoft 365 admin center. Please consult Microsoft resources on choosing the correct approach that meets your organization’s needs. For specific details on ArcGIS for Excel, you can learn more about installation and management from the online resources.
What can be done without logging into ArcGIS? What are the benefits of having an ArcGIS identity?
Without an ArcGIS identity users can visualize data that has latitude and longitude coordinates or Esri JSON Geometry. Users can interact with these maps to gain insights by measuring distances and areas on the map. The map can show additional context by incorporating spatial data from the Living Atlas and a subset of basemaps.
With an ArcGIS Identity, users can access your organization’s authoritative data and advanced analysis capabilities, including geocoding, geoenrichment, cell functions, drive-time analysis, and spatial filtering. You can create and manage feature layers and edit hosted or related tables directly in an Excel spreadsheet. Edits made to the fetched data will update the hosted layer.
Is ArcGIS for Excel supported in disconnected environments?
It is, for more information on the ArcGIS for Excel disconnected package, please contact your Esri Account manager.
Do Geocoding and ArcGIS Functions consume credits?
Yes. Credit consumption information is available in ArcGIS for Microsoft 365 Credits documentation.
Support and General Usage
What are the supported Excel versions for ArcGIS for Excel?
Please refer to the documentation for supported Excel versions.
Does ArcGIS for Excel work with custom geocoders?
Yes, all geocoders available in your ArcGIS Online or ArcGIS Enterprise can be used as part of address functions.
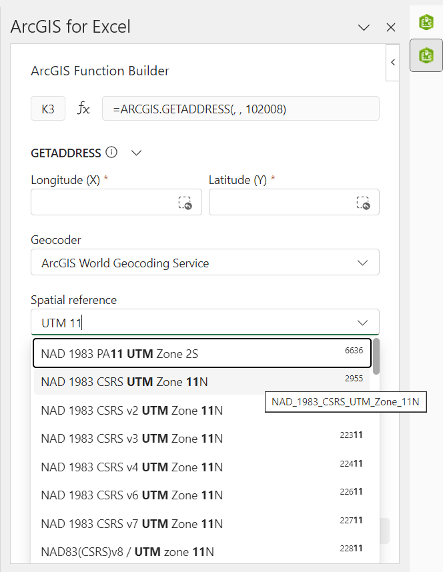
Is it possible to convert addresses into non-Web Mercator coordinates using the ArcGIS for Excel Geocoding function?
Yes. ArcGIS for Excel supports many spatial references. A full list of options is presented in a drop-down list allowing users to choose the appropriate coordinate system.

How can you use layers in ArcGIS Pro that were created in ArcGIS for Excel?
You can publish the ArcGIS for Excel layers to ArcGIS Online or ArcGIS Enterprise, and those layers can be accessed in ArcGIS Pro.
If I share a spreadsheet with a map, can the recipient see the map?
There are a few considerations for the recipient to be able to see the map in the spreadsheet. At a minimum, they will need to have the ArcGIS for Excel add-in. Because ArcGIS for Excel follows the ArcGIS sharing model, if the map includes secured layers, they will need to be authorized to access the referenced layers.
Editing
How much control do I have over my editing? Can the editing process be more collaborative?
You can only make changes to layers you have permission to edit. With editing permissions, you can add or update records in hosted feature layers/tables.
Can I add new features to an ArcGIS feature layer using Excel?
Currently this workflow is not supported.
Can I track changes when multiple people are editing an ArcGIS layer in Excel?
This can be done by enabling Keep track of changes to data’ and ‘Keep track of who edited data’ settings on the ArcGIS item’s Settings tab.

ArcGIS for SharePoint
Access and Licensing
What licensing do I need for ArcGIS for SharePoint?
To begin using ArcGIS for SharePoint with the standard experience, which provides access to public ArcGIS data and basic functionality, no additional license is needed. However, the app must be installed by a SharePoint or Microsoft 365 administrator. For access to advanced services and your organization’s ArcGIS data, you will need to sign in using your ArcGIS credentials.
Who is authorized to install ArcGIS for SharePoint, and how can it be installed and configured?
The component must be enabled by a SharePoint or Microsoft 365 tenant administrator. They can choose to make it available on all sites or only specific ones. For detailed instructions on installing and managing ArcGIS for SharePoint, please consult the
documentation.
Can I use my ArcGIS Enterprise account to sign in?
You can sign in using either an ArcGIS Enterprise or an ArcGIS Online account.
Will the ArcGIS for SharePoint app work in a secure environment? (e.g. GCC(High))
Currently, the ArcGIS for SharePoint component is not available in the GCC(High) environment, but it is accessible in a GCC environment.
Does Esri offer ArcGIS for SharePoint as an “on-prem” solution?
Esri does not offer an on-prem solution. ArcGIS for SharePoint app is built using the SPFx framework for SharePoint Online only.
Does the geocode feature in ArcGIS for SharePoint consume credits?
The consumption of credits depends on the type of geocoder used. Custom geocoders do not consume credits, but credits are consumed when Esri’s geocoding services. For more information on Credit consumption, please refer to the credit consumption documentation.
Support and General Usage
What are the capabilities of ArcGIS for SharePoint?
ArcGIS for SharePoint can enhance your SharePoint site by adding dynamic maps that allow for visual data analysis. You can incorporate information from a variety of sources, including SharePoint lists, feature services, and web maps. You can geotag and geosearch for SharePoint documents on an ArcGIS for SharePoint map. You can enhance the functionality of your SharePoint list by geocoding it, which allows you to add spatial information to your data. For more information on all the capabilities of ArcGIS for SharePoint, please refer to the documentation.
What analysis can I do with the application?
ArcGIS for SharePoint is more than a visualization tool. Users can perform drive time analysis, measure linear distances, and calculate the area and perimeters. For more information on analysis tools, please refer to the documentation.
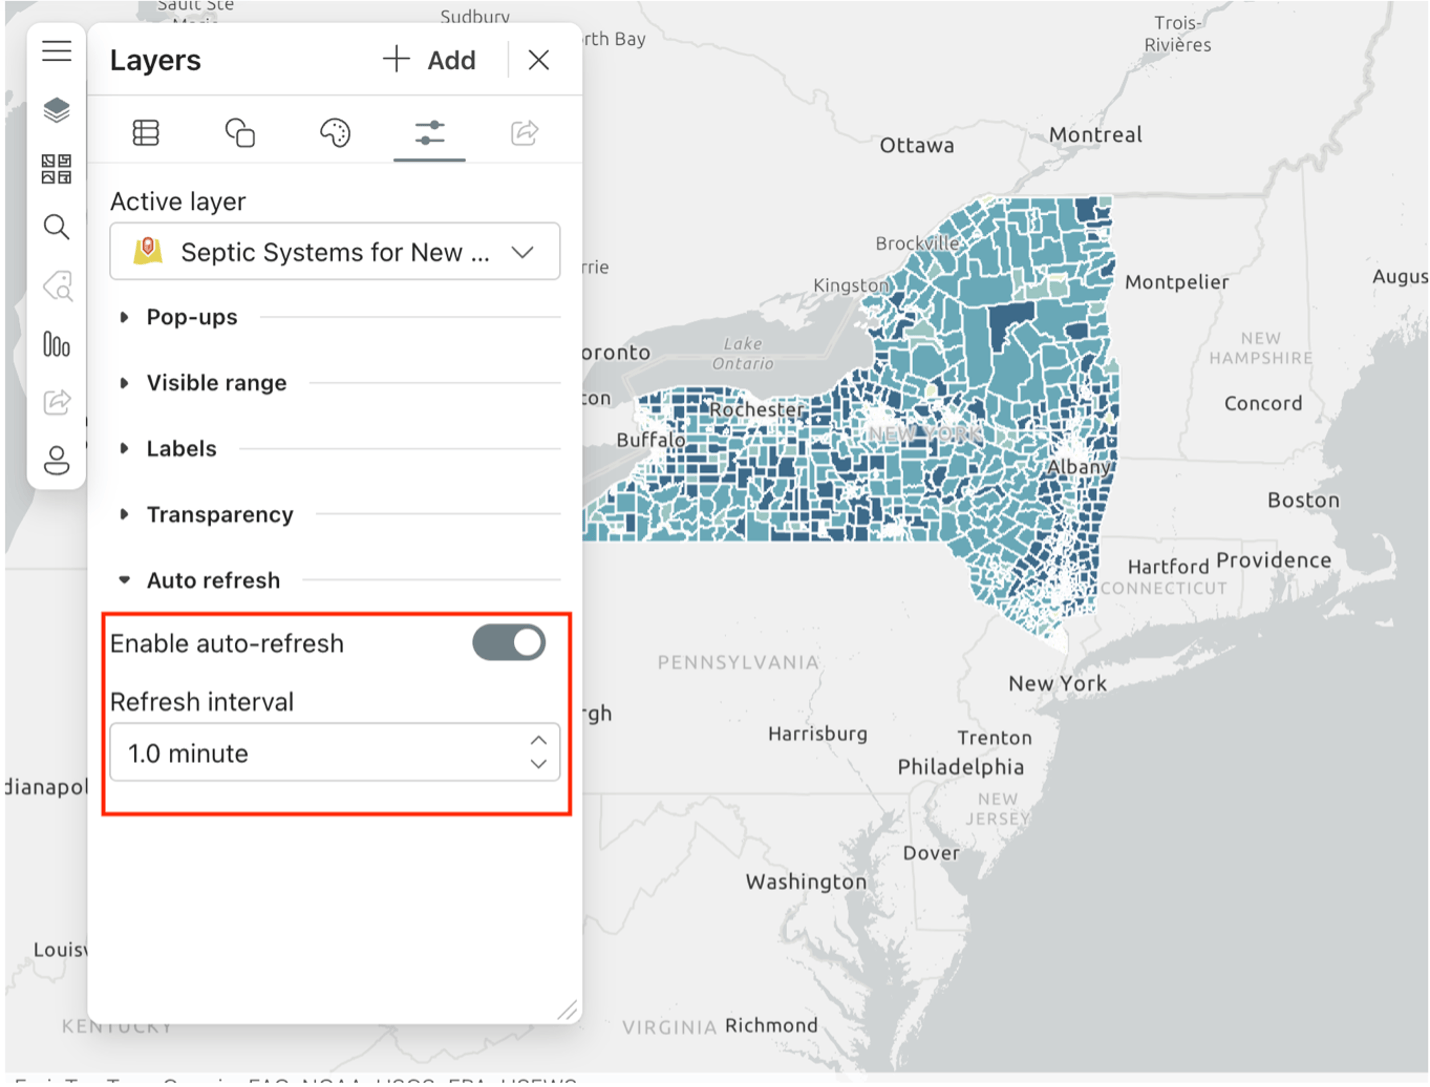
If my SharePoint list updates, can I see the changes in the maps?
You can set the layer refresh interval under layer properties to reflect list changes in the map.
Can I edit features in ArcGIS for SharePoint?
In the current release, you can only edit the location information of the Feature Service. To do this, you need to import the Feature Service data into a SharePoint list and then use the ‘Edit locations’ feature. Note that the edits will reside in the SharePoint list and will not be pushed back to the feature layer.
Will GeoSearch results enable users to see documents they do not have access to?
No, GeoSearch follows Microsoft’s sharing model and users will only see documents they can access.
When updating my SharePoint lists, does it update a layer in the map?
Yes, the edits will appear in the map when you need to enable “auto-refresh” for the layer which is available under “layer properties”.


ArcGIS for Teams
Access and Licensing
How can I install ArcGIS for Teams?
You can install ArcGIS for Teams from Microsoft AppSource to a personal (private) scope or to a selected team, chat, or meeting channel. For more detailed instructions on how to install ArcGIS for Teams, please read the documentation.
What if I do not see ArcGIS for Teams in my AppSource?
If you do not see the app in the Team’s AppSource, please contact your Microsoft 365 or Teams administrator to enable the component.
Do I need additional licensing to use ArcGIS for Teams?
To start using ArcGIS for Teams, you do not need additional licensing, you just need to install the component. However, to access the full suite of ArcGIS capabilities and your organization’s ArcGIS data, you will need an ArcGIS identity.
Do users still need ArcGIS credentials to visit secured items in ArcGIS for Teams?
ArcGIS for Teams respects the ArcGIS sharing model and users would need an ArcGIS identity and be authorized to access secured maps, apps, and layers.
Support and General Usage
What does ArcGIS for Teams do?
You can use ArcGIS for Teams to bring maps and location intelligence into Microsoft Teams.
ArcGIS for Teams allows you to quickly and seamlessly share an interactive web map in a channel or meeting. ArcGIS for Teams can be used to search for and share publicly available ArcGIS Online content. When you sign in to an ArcGIS Online or ArcGIS Enterprise account, you can search for your own or your organization’s authoritative content, including maps, apps, layers, and more.
Additionally, you can use the live collaboration and sharing features in ArcGIS for Teams to allow all meeting or call participants to interact with spatial content. Participants can independently explore a shared map, change presenters, sketch, annotate and interact with a comprehensive library of publicly available ArcGIS location data.
Could we do live sharing with other apps like StoryMaps and Dashboards?
Yes, live share feature allows users to share ArcGIS apps including StoryMaps and Dashboards in live meetings. Currently, sketching or annotating features are not supported for these apps.

ArcGIS for Power BI
Access and Licensing
I can’t see the ArcGIS for Power BI custom visualization in Power BI. I thought it was built-in?
Although ArcGIS for Power BI is a custom visualization delivered with Power BI, it’s possible your Microsoft 365 tenant administrator has disabled it. To resolve this issue, please work you’re your Azure tenant administrator to confirm settings in both your Microsoft 365 tenant and Power BI.
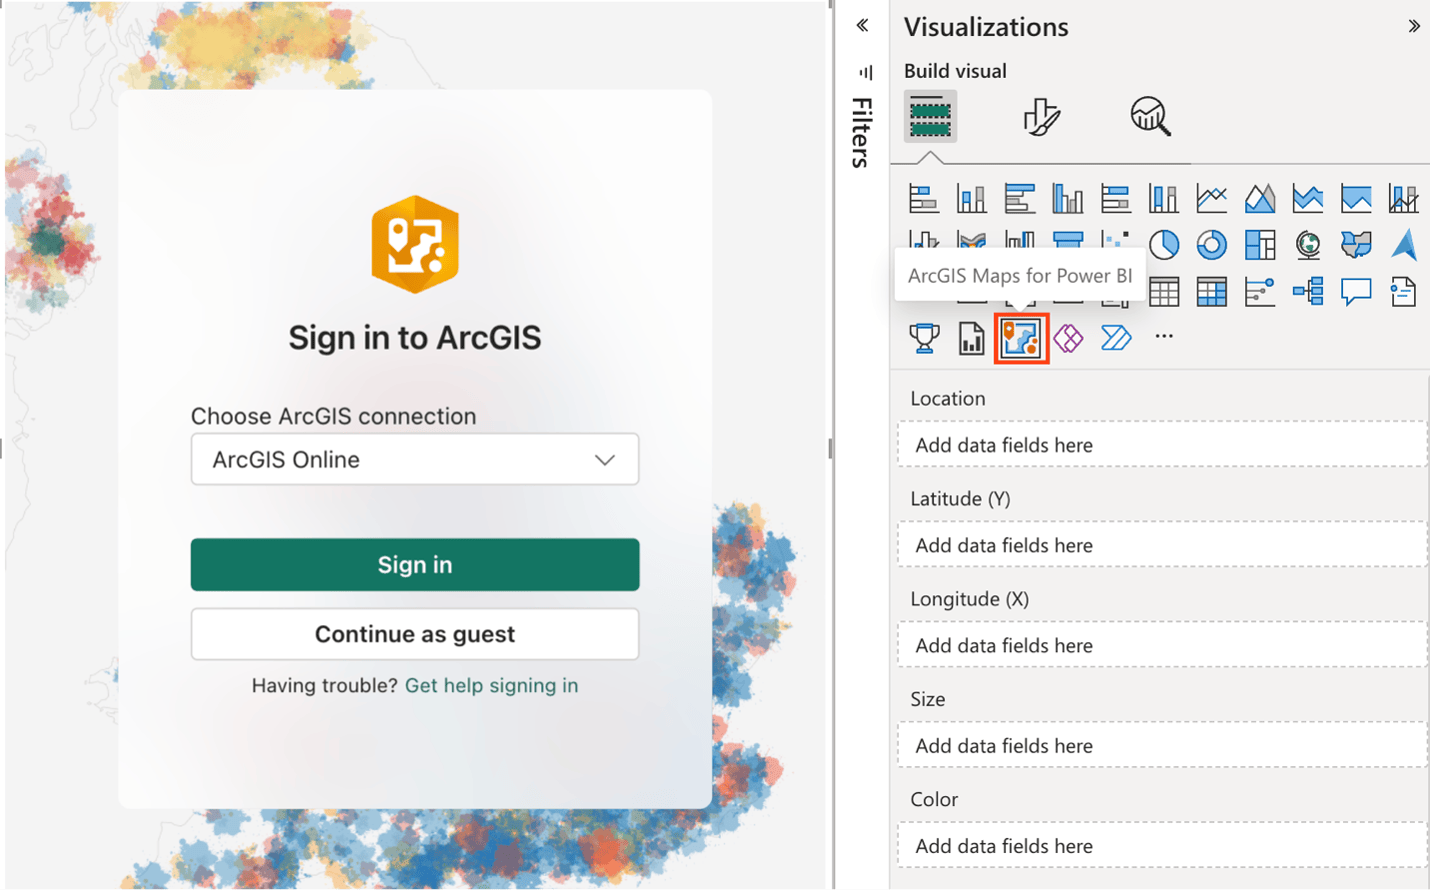
I have an ArcGIS account and Power BI but don’t know how to connect them together.
To connect your ArcGIS account with Power BI, start by adding the ArcGIS Map for Power BI visualization to your report. Once the map is in place, click on “Sign In” at the top of the map and enter your ArcGIS account credentials. This will allow you to access and use your ArcGIS data directly within Power BI.

Does ArcGIS for Power BI require a license?
ArcGIS for Power BI is a built-in visual within Power BI and does not require a separate license to access or install. Users who do not sign in with an ArcGIS account can still use ArcGIS for Power BI, although they will face a limited set of functionalities.
Why do I need to use ArcGIS Enterprise for Power BI Report Server?
ArcGIS for Power BI relies on proxy services provided by Esri to perform multiple operations inside the component. Security constraints in Power BI Report Server prevents the URL’s of the services from being accessed as it is not possible to add all those sites to an allow list in the proxy service.
How many credits does ArcGIS for Power BI consume?
There are very few instances where credits are consumed in Power BI Report Server.
Whether you are a Standard user or signed in with your ArcGIS identity, currently, no credits are consumed in ArcGIS for Power BI.
Support and General Usage
How many features can I add on the map? Can I use clustering or binning to get around the feature limit?
The upper limit of any set of features is 30,000. There are variances using different data types. For example, a maximum of 15,000 polygons can be added. Clustering or binning cannot be utilized to bypass the 30,000 limit. However, clustering provides a more organized representation on the map, enabling users to efficiently visualize the distribution of features within specific areas.
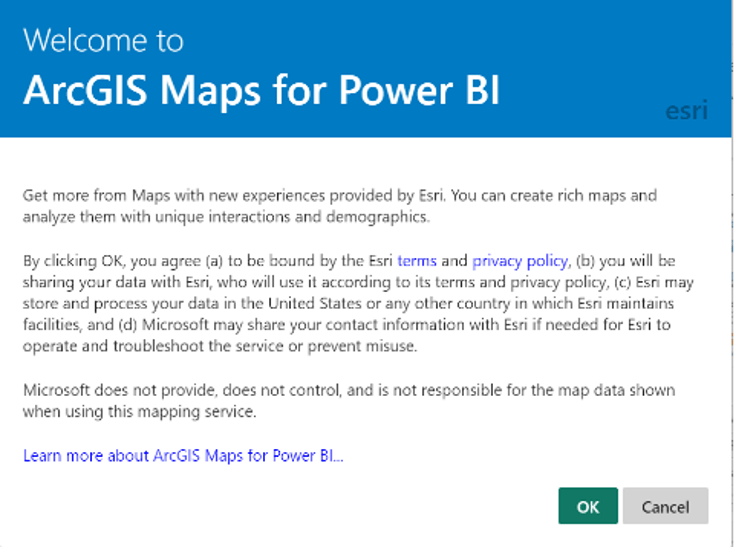
I am prompted with this disclaimer when I use ArcGIS for Power BI for the first time. Is this safe to use?

The application is safe to use and follows both Esri and Microsoft’s security practices. For legal and contractual reasons, Microsoft displays the splash screen when a user first accesses ArcGIS for Power BI. As an out of the box visualization, users must acknowledge Esri’s terms and conditions and consent to there being a chance data may be transmitted beyond the organization’s security boundaries. ArcGIS is a service-based system, when a user gets layers from the user’s ArcGIS environment or when data is sent out Geocoding in ArcGIS Online, it could be routed to a different region outside of the user’s normal region depending on where the user’s request originates from.
Can I edit or style ArcGIS layers in ArcGIS for Power BI?
ArcGIS layers cannot be styled in ArcGIS for Power BI visualization. Within the layer properties, you can toggle the layer visibility, show layer details, zoom to the layer, enable labeling, and set the auto-refresh interval for feature layer. Additional
ArcGIS layers are added as reference layers providing contextual information for your Power BI report and their rendering cannot be adjusted.
Why do I always see a blocking page on the map when I open an embedded report?
The blocking page you’re encountering when opening the embedded report is due to permission restrictions. To view the embedded map, please make sure to sign in to ArcGIS before embedding. More importantly, please make sure no data has been added to the Location field well if X Y values have been added.
Running a validation check on embed and publish will be helpful to see which items don’t meet the requirement.
Can I use my organization’s geographic data in a Power BI report?
Yes, for now the visualization only supports Esri JSON format geometry.
How can I integrate my Fabric data with Power BI?
Whether you are using Power BI Semantic Models or are accessing the data through a Data hub, you will be able to reference the location information the same way you would with Power BI datasets. When the data is referenced in the report, drag the appropriate field into the location or Longitude and Latitude wells. For more information on how to get Fabric data into Power BI, please read the Microsoft documentation.

ArcGIS Connectors for Power Automate
Are the ArcGIS Connectors for Power Automate supported in GCC High?
ArcGIS connectors are not currently supported in GCC (High) environment. However, all three connectors are available in GCC.
What type of license do I need to access the ArcGIS Connector?
To access the connectors, you will require a Power Automate Premium.
What versions of ArcGIS Enterprise are supported with the connector?
ArcGIS Enterprise 11.0 and above are officially supported with ArcGIS Connectors for Power Automate.
Can I use a disconnected ArcGIS Enterprise environment with the connector?
No, ArcGIS Connectors for Power Automate do not support connections to disconnected ArcGIS Enterprise deployments or configurations using a Microsoft on-premises data gateway.
Are the ArcGIS Connectors for Power Automate supported in Power Automate Desktop?
No. The connector is only available in Power Automate Cloud.
Why can’t I name my connections in Power Automate?
This is a known issue and a current limitation in the Power Automate system and the ArcGIS for Microsoft 365 team is working with Microsoft to come up with a solution.
Additional Resources
We hope you enjoyed this year’s User Conference and benefited from the support and demos in the showcase area, as well as the seminars and sessions. If you’re interested in learning about the capabilities and full descriptions of each ArcGIS for Microsoft 365 component, please visit the ArcGIS for Microsoft 365 product page, check the documentation and read our latest blog post What’s New in ArcGIS for Microsoft 365. Also, continue to share your feedback and ideas on how to improve our products on the Esri community site.


Article Discussion: